
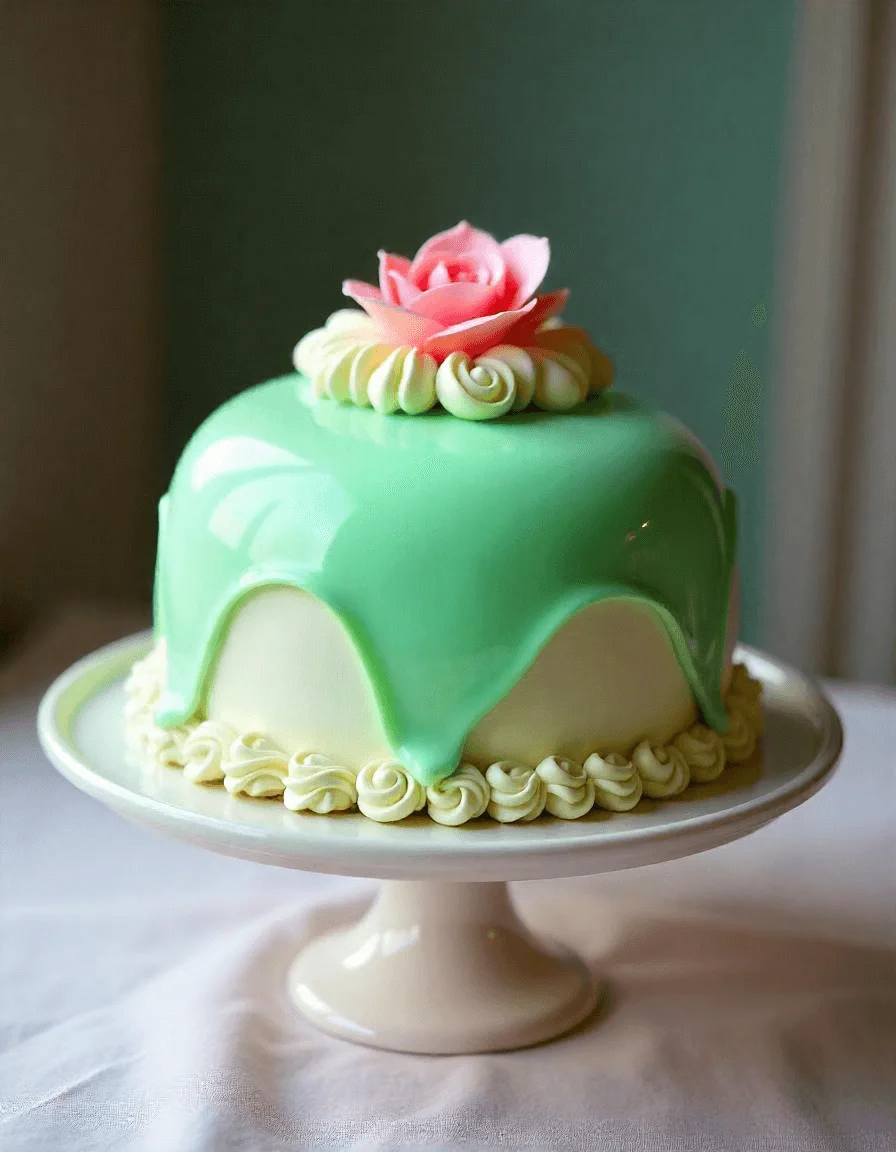
A princess cake is a whimsical and elegant dessert that adds magic to any celebration. It’s perfect for birthdays, royal parties, or special occasions. The cake consists of soft sponge layers, smooth buttercream frosting, and delicate fondant. Often decorated with edible glitter, fondant shapes, and cake toppers like princesses or crowns, it’s both a treat for the eyes and taste buds. Whether you’re an experienced baker or a beginner, making a princess cake is fun and rewarding. This guide will take you through each step, from ingredient selection to decorating your cake like royalty.
Introduction to the Princess Cake: A Delightful Royal Treat
Crafting the Perfect Cake for Any Celebration
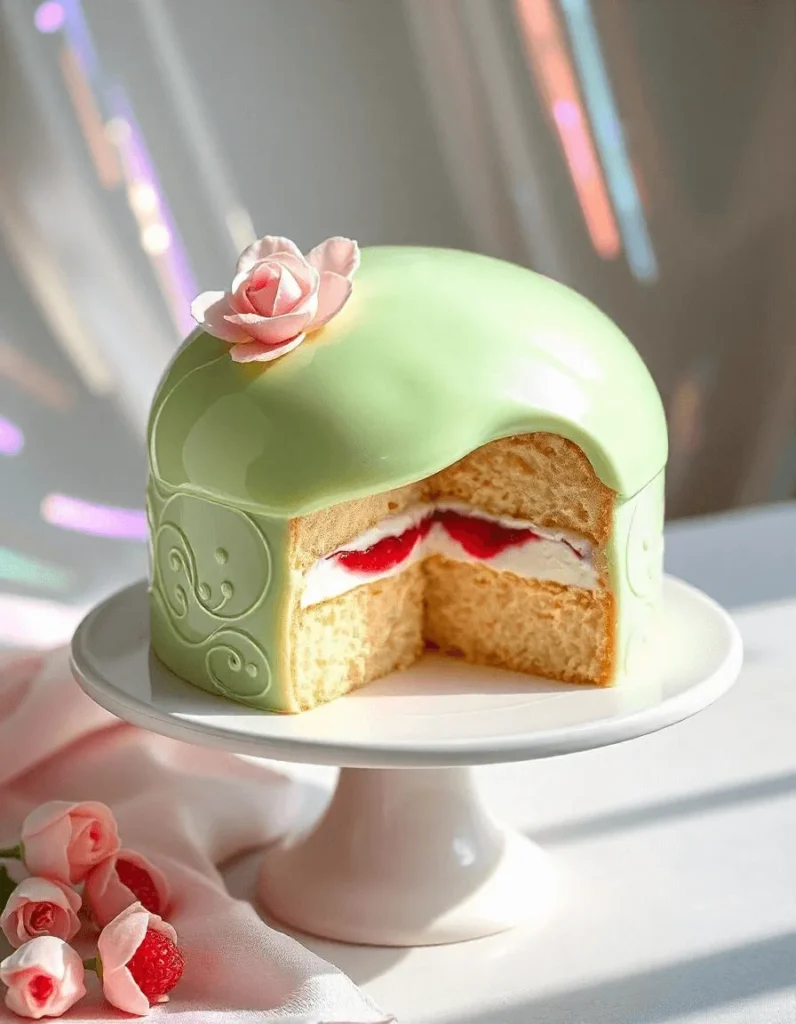
A princess cake makes a delightful dessert for birthdays and special occasions. It features soft sponge cake layers, jam, and buttercream. Bakers cover the cake with fondant, often in pastel colors, and decorate it with edible glitter and piped designs. Toppers like crowns or princess figurines add charm, making it perfect for royal-themed parties.
Why is the Princess Cake Perfect for Birthday Parties and Royal Celebrations?
The princess cake is ideal for birthday parties and royal celebrations because it combines both beauty and flavor. Its vibrant, pastel colors and elegant design capture the attention of guests, making it a showstopper at any event. The layers of soft sponge cake, jam, and buttercream create a delicious treat that everyone will love. Plus, with its royal-themed decorations, such as crowns, princess figurines, and edible glitter, it sets the perfect tone for a magical, fairy tale-inspired celebration. This cake’s whimsical and sophisticated look adds a touch of magic to birthdays or any special occasion that calls for something extraordinary.
Overview of the Steps to Create a Beautiful Princess Cake
Creating a beautiful princess cake is easier than you might think. First, bake your cake layers, ensuring they are soft and fluffy. Once cooled, stack the layers with your choice of filling, such as jam or buttercream. Then, cover the entire cake with a smooth layer of fondant, making sure it fits neatly around the edges. Next, add decorative touches like piped designs, edible glitter, and colorful accents to create a magical look. Finally, place princess-themed toppers, such as figurines or crowns, to complete the royal effect. With a few simple steps, you can create a stunning princess cake that will wow your guests and make any celebration feel like a fairy tale.
Essential Ingredients for a Princess Cake Recipe
The Perfect Cake Base: Choosing Between Sponge, Butter, or Cake Mix
The foundation of any great princess cake starts with choosing the right cake base. Sponge cake is light and airy, making it perfect for layering and holding up under frosting and decorations. Butter cake, on the other hand, is rich and moist, offering a slightly denser texture that pairs well with fillings like jam or cream. If you’re short on time or prefer simplicity, a cake mix can be a quick and reliable option, providing consistent results with less effort. Each type of cake base brings its unique texture and flavor, so choose one based on your preference for lightness, richness, or convenience
Buttercream Frosting vs. Fondant for a Smooth, Royal Finish
When it comes to achieving a smooth, royal finish for your princess cake, both buttercream frosting and fondant have their advantages. Buttercream frosting is creamy, easy to work with, and offers a delicious flavor, making it a popular choice for cake decorators. It provides a smooth surface if applied correctly, but it may not give the same polished, sleek look as fondant. Fondant, however, creates a flawless, smooth finish and can be rolled out to cover the entire cake seamlessly. It holds its shape well and can be molded into intricate designs, making it ideal for a royal, elegant look. While fondant can be less sweet than buttercream, it gives your cake a refined, professional appearance. Choose buttercream for flavor or fondant for a smooth, sophisticated finish.
The Importance of Edible Glitter and Cake Toppers for Decoration
Edible glitter and cake toppers are essential for adding that extra touch of magic to your princess cake. Edible glitter gives the cake a shimmering, enchanting look, making it feel truly special and celebratory. It catches the light, adding sparkle that enhances the overall presentation. Cake toppers, like princess figurines, crowns, or themed decorations, bring the cake to life, giving it a personalized and royal touch. These decorative elements transform an ordinary cake into a showstopper, making it the perfect centerpiece for any princess-themed party. Together, glitter and toppers help set the tone for a magical, unforgettable celebration.
Step-by-Step Guide to Making a Princess Cake
Preparing Your Cake Layers: Tips for a Tall, Fluffy Cake
Creating a tall, fluffy princess cake requires attention to detail. Therefore, follow these steps to ensure your cake layers are light, airy, and perfect for stacking and decorating.
1. Choose the Right Cake Recipe
First, start by selecting a light cake recipe, such as sponge or chiffon cake. These cakes are ideal for creating a fluffy texture that holds up well for decorating.
2. Measure Ingredients Accurately
Next, make sure to measure your ingredients accurately. For instance, using a kitchen scale for dry ingredients ensures the batter remains light and prevents it from becoming too dense.
3. Whisk Eggs and Sugar Properly
Then, whisk your eggs and sugar until the mixture becomes pale and fluffy. This step is crucial because it creates air pockets in the batter, which help the cake rise evenly.
4. Avoid Overmixing the Batter
Additionally, be careful not to overmix the batter. Mixing just until combined will prevent air bubbles from being lost, which ensures a light and fluffy cake.
5. Prepare the Cake Pans
Also, grease your cake pans well and line them with parchment paper. This helps to prevent sticking and ensures your cakes maintain their shape as they bake.
6. Bake at the Correct Temperature
Moreover, bake your cakes at the right temperature to ensure they rise evenly. Preheating the oven is essential to get the best results, so don’t skip this step.
7. Cool Completely Before Decorating
Finally, let your cake layers cool completely before decorating. If the layers are warm, frosting or fondant can melt, so be sure to allow them to cool fully to ensure the layers stay intact.
By following these simple steps, you’ll create tall, fluffy layers that are perfect for building your princess cake.
How to Frost Your Princess Cake with Smooth Buttercream
Frosting your princess cake with smooth buttercream requires a few simple steps. Follow these guidelines to achieve a flawless, silky finish for your cake.
1. Prepare Your Buttercream
Start by making or purchasing a smooth, creamy buttercream. To do this, beat softened butter with powdered sugar, a splash of vanilla extract, and a bit of milk until it’s light and fluffy. This creates a smooth base that’s easy to spread.
2. Crumb Coat the Cake
Next, apply a thin layer of buttercream to the cake. This is called the “crumb coat” and helps seal in the crumbs. Spread the buttercream evenly across the surface and edges. After this, chill the cake for about 15 minutes to set the crumb coat.
3. Apply the Final Layer of Buttercream
Once the crumb coat is set, apply a thicker, even layer of buttercream over the entire cake. Use an offset spatula to spread the frosting smoothly from top to bottom, making sure to cover all sides.
4. Smooth the Frosting
After applying the final coat, use a bench scraper or a straight-edged spatula to smooth the buttercream. Hold the scraper at a 45-degree angle and gently rotate the cake to achieve a perfectly smooth finish.
5. Chill the Cake Again
For the smoothest possible finish, chill the cake for another 10-15 minutes after smoothing the buttercream. This will set the frosting, making it easier to add additional decorations.
By following these steps, you’ll create a perfectly frosted princess cake with smooth, velvety buttercream, ideal for adding royal touches like fondant details or edible glitter.
Using Fondant for Intricate Princess-Themed Decorations
Fondant is perfect for creating detailed princess-themed decorations that will make your cake look royal. Here’s how to use fondant effectively for stunning results.
1. Roll Out the Fondant
First, begin by rolling out your fondant on a clean, flat surface dusted with powdered sugar or cornstarch. Then, use a rolling pin to flatten it to about 1/8-inch thickness. Make sure it’s large enough to cover your cake. This step ensures a smooth, even base for the rest of your decorations.
2. Cover the Cake with Fondant
Once your fondant is rolled out, gently lift it and drape it over the frosted cake. Start at the top and, gradually, work your way down. Use your hands or a fondant smoother to smooth the fondant over the sides. Afterward, trim any excess fondant around the base of the cake for a clean, professional finish.
3. Create Princess-Themed Decorations
Next, it’s time for the fun part—creating your princess decorations. Roll out small pieces of fondant and, using cookie cutters, molds, or freehand carving, create shapes like tiaras, crowns, or dresses. Additionally, you can color the fondant with gel food coloring to match your theme.
4. Attach the Decorations
To attach the fondant decorations to the cake, use a little water or edible glue. Lightly brush the back of the pieces before pressing them gently onto the cake. For extra elegance, you can add edible glitter or sugar pearls to create a sparkling finish.
5. Let the Cake Set
Finally, allow the fondant decorations to set for a few hours before serving. This will help firm up the decorations and ensure that everything stays in place.
By following these simple steps, you’ll create intricate, princess-themed fondant decorations that will elevate your cake and make it fit for royalty.
The Best Techniques for Stacking and Assembling a Multi-Layered Princess Cake
Assembling a multi-layered princess cake requires care to ensure each layer is sturdy and stable. Follow these steps to stack your layers perfectly and achieve a professional finish.
1. Level Your Cake Layers
Start by leveling your cake layers with a serrated knife. This ensures each layer is even and flat. By removing any domed tops, you create a stable foundation for stacking, preventing the cake from tipping over.
2. Apply a Layer of Buttercream Between Each Cake
Once your cakes are level, spread a thin layer of buttercream on top of each cake layer. This acts as both a delicious filling and a stabilizer, helping to keep the layers together as you stack them.
3. Use Dowels for Support
Next, insert dowels or cake supports into the center of the bottom layers. These dowels prevent the weight of the upper layers from crushing the lower ones. Cut the dowels to the height of the cake and insert them evenly around the center, leaving enough room for the top layers to sit comfortably.
4. Stack the Cake Layers Slowly
Carefully lift each layer and place it on top of the previous one. Start with the heaviest layer at the bottom, and work your way up. Use a cake lifter or a flat spatula to help position the layers evenly, ensuring each layer is aligned perfectly.
5. Frost the Entire Cake
Once all the layers are stacked, frost the entire cake with a smooth layer of buttercream. Use an offset spatula to spread the frosting evenly. Be gentle to avoid shifting the layers. This creates a uniform, polished look for your cake.
6. Add Final Touches
Finally, add your princess decorations on top of the stacked layers. These could include fondant decorations, edible glitter, or a princess-themed cake topper. Ensure everything is stable by pressing the decorations gently into the frosting.
By following these techniques, you’ll successfully stack and assemble a multi-layered princess cake that’s both beautiful and structurally sound.
Creative Princess Cake Decorating Tips
How to Pipe Decorative Designs Like Lace or Crowns with Buttercream
Piping decorative designs like lace or crowns with buttercream is a beautiful way to add intricate details to your princess cake. Here’s how you can master these techniques:
1. Prepare Your Piping Bag and Tip
Start by preparing your piping bag. Fill the bag with buttercream, using a smooth consistency that’s not too thick or thin. For lace designs, use a fine round tip (like a #1 or #2), and for crowns, use a star tip (like a #16) for a more textured look.
2. Practice on Parchment Paper
Before you begin decorating the cake, practice your designs on parchment paper. This allows you to get a feel for the piping pressure and technique. For lace, try delicate, connected lines; for crowns, pipe evenly spaced star shapes in a row.
3. Pipe Lace Designs
To pipe lace, start by creating small, even loops or “S” shapes in a continuous pattern. Begin at the base of your cake and work your way up, piping small, delicate lines that overlap slightly. The key is to keep the design light and airy, ensuring the lace effect is soft and elegant.
4. Pipe Crown Designs
For crowns, start at the top of the cake and pipe a row of star-shaped points using a star tip. The size of the points will determine the look of your crown. For a more intricate crown, pipe multiple layers of stars, slightly overlapping each row to create a layered, regal effect. You can also use pearls or edible glitter to add sparkle.
5. Use Consistent Pressure
When piping, maintain consistent pressure on the piping bag. This ensures even lines and shapes. For lace, make sure the loops or lines are evenly spaced and symmetrical. For crowns, try to make each star uniform in size for a polished, professional look.
6. Finish with Extra Decorative Touches
Once the lace or crown is piped, you can add further decoration. Use edible pearls, rhinestones, or sugar flowers for a more glamorous effect. A light dusting of edible glitter or gold leaf will enhance the royal feel of the cake.
Adding Edible Glitter for a Magical Touch
Edible glitter is an excellent way to add sparkle and a magical feel to your princess cake. Here’s how to use it effectively for a stunning, shimmering finish.
1. Choose the Right Edible Glitter
Start by choosing edible glitter that’s safe for cakes. Look for food-grade glitter, available in various colors, from gold and silver to pink and purple, matching your princess theme. Make sure it’s specifically labeled as edible, as some glitters are only suitable for non-edible crafts.
2. Apply Glitter to Dry Surfaces
For the best results, apply glitter to areas of your cake that are dry. After frosting the cake with buttercream or fondant, let it set for a few minutes. If you apply glitter on wet frosting, it may melt and lose its sparkle.
3. Use a Light Dusting for a Subtle Effect
To create a soft, magical touch, lightly dust the glitter over the cake with a small paintbrush. Hold the glitter in a container and use a clean, dry brush to pick up a small amount. Gently tap the brush over the cake to evenly distribute the glitter, creating a delicate shimmer.
4. Concentrate Glitter on Key Areas
Focus the glitter on focal points like the top of the cake, around the decorations, or where you’ve piped designs like lace or crowns. This draws attention to the most important elements of your cake while enhancing its beauty.
5. Consider a Glitter Spray for a Bold Effect
If you want a more dramatic, all-over effect, you can use an edible glitter spray. Hold the spray about 6-8 inches from the cake and gently mist it across the surface. This method works well for covering large areas with a fine, even layer of sparkle.
6. Add Glitter to Cake Decorations
For extra glamour, sprinkle edible glitter directly onto fondant flowers, figurines, or other cake decorations. This will give them a magical, shimmering finish, making them stand out on the cake
Selecting Princess Cake Toppers (e.g., Princess Figurines or Crowns)
Choosing the right cake topper is essential to bring your princess cake to life. Here’s how to select the perfect topper for a magical finish.
1. Match the Theme of the Party
When selecting a topper, ensure it aligns with the theme of the party. If the party is based on a specific princess, like Cinderella or Elsa, choose a figurine that matches the character. Alternatively, opt for a crown or tiara for a more generalized princess look that can suit any royal celebration.
2. Consider the Size of Your Cake
The size of the topper should complement the size of your cake. For smaller cakes, use smaller figurines or simple crown toppers. Larger cakes can handle more elaborate, taller decorations, such as a detailed princess figurine or a multi-tiered crown.
3. Choose High-Quality, Food-Safe Toppers
Ensure the topper is food-safe and suitable for cakes. Many princess figurines are made from plastic or resin, which is fine as long as it doesn’t touch the cake directly. You can use a cake board or stand to support the topper, ensuring it’s placed safely on top.
4. Opt for Edible Toppers for a Wholesome Touch
If you prefer an entirely edible topper, you can choose from options like fondant crowns, sugar flowers, or handmade edible princess figurines. These add an elegant, seamless touch to your cake and can be easily customized to match the theme.
5. Think About the Cake’s Design
Make sure the topper complements the rest of the cake’s design. If your cake is covered in intricate lace piping or a smooth fondant finish, a simple, elegant crown might be the best choice. For a cake with more playful elements, like a princess castle or whimsical decor, a figurine might be the better fit.
6. Add Personalization with Custom Toppers
For an extra personal touch, consider custom toppers. These could be a princess figurine with the guest of honor’s name or age, or a crown with a special message. Custom toppers make the cake even more unique and memorable.
Selecting the right princess cake topper enhances the overall look and adds a magical focal point to your cake. Whether you choose a figurine, crown, or custom creation, make sure it fits the party’s theme and cake size for a beautifully coordinated result
Learn how to create stunning marzipan roses with this comprehensive guide on Sprinkle Bakes.
Tips for Personalizing Your Princess Cake Design
Customizing Your Princess Cake for Different Themes (e.g., Fairy Tale, Royal, or Birthday)
Customizing your princess cake to fit various themes adds a personalized touch to the celebration. Here’s how to adjust your design for different princess cake themes:
1. Fairy Tale Theme
For a fairy tale-inspired princess cake, focus on whimsical elements like castles, fairy dust, and magical creatures. Use pastel-colored frosting and fondant to create soft, enchanting designs. Add edible glitter for sparkle and decorate with sugar butterflies, fairies, or delicate flowers. A figurine of a classic fairy tale princess like Cinderella or Snow White can sit atop the cake, surrounded by whimsical, magical decorations.
2. Royal Theme
A royal princess cake is all about elegance and grandeur. Use rich, regal colors like gold, silver, and deep purples or pinks. Create a luxurious look with fondant for smooth, polished surfaces and intricate piping designs such as lace or royal patterns. Add a crown or tiara topper to represent the princess’s royalty, and consider adding pearls, rhinestones, or edible gold leaf for extra sparkle. Royal-themed cakes can also feature designs like a royal carriage or throne.
3. Birthday Theme
A birthday-themed princess cake can be personalized for the birthday girl. Choose colors based on her favorite princess or a color scheme she loves. Incorporate fun and playful elements like balloons, birthday candles, or a “Happy Birthday” message piped in bright, bold frosting. You could also use a figurine of the birthday girl’s favorite princess character or create a multi-tier cake with each tier representing a different element of her favorite story or theme.
4. Incorporating a Mix of Themes
If you want to combine different themes (e.g., a royal fairy tale birthday), mix elements from both. For example, use a castle shape for the cake, but decorate it with royal gold and silver accents while adding whimsical fairytale decorations like stars and a princess figurine. You can create tiers for each theme, blending them into one cohesive design.
5. Personalizing with Colors and Toppers
Regardless of the theme, personalize the cake further with specific colors and custom toppers. Choose colors that reflect the princess’s personality or favorite things. Toppers can be customized to feature initials, age, or a favorite character to make the cake feel extra special.
How to Color Your Princess Cake to Match the Party Theme
Coloring your princess cake is an important part of making it match the party theme. Here’s how to choose and apply the perfect colors for a stunning look:
1. Choose Theme-Appropriate Colors
Select colors that align with the theme of the party. For a classic fairy tale or royal theme, opt for pastel shades like light pink, lavender, or soft blues. For a more royal, opulent look, use bold, rich colors like gold, deep purple, or royal blue. Bright colors like pink, purple, and yellow are perfect for a fun, birthday-themed princess cake.
2. Use Colorful Fondant or Buttercream
Fondant provides a smooth, polished finish and can be easily colored. You can roll fondant in shades matching the theme, whether it’s soft pink for a fairy tale look or vibrant red for a royal feel. Buttercream also works well for adding color, allowing you to pipe vibrant flowers, details, or borders onto your cake. Simply use gel food coloring to achieve the desired hue.
3. Color Your Cake Layers
For a multi-layer cake, consider coloring the individual cake layers inside. This creates a fun surprise when the cake is cut. Layered colors like pink and purple or even ombré effects (where one color fades into another) are great ways to make the cake visually exciting and tie it into the theme.
4. Use Edible Glitter for Extra Sparkle
Add edible glitter in complementary colors to enhance your theme. Gold or silver glitter is perfect for a royal cake, while pastel-colored glitter matches well with a fairy tale theme. A light dusting of glitter on the top or sides of the cake will give it a magical, enchanting look.
5. Incorporate Color into Cake Decorations
Besides the cake’s base color, use colored decorations to complement the theme. For a birthday cake, colorful candies, balloons, or sprinkles work well. For a royal theme, incorporate gold, silver, or jewel-toned accents in your cake topper or edible decorations. Fairy tale cakes can include sparkly stars, sugar flowers, or whimsical butterflies in bright, soft hues.
6. Personalize with the Birthday Girl’s Favorite Colors
Don’t forget to personalize the cake with colors the birthday girl loves! Whether it’s her favorite shade of pink, purple, or any color she adores, using these in the cake’s design makes the cake even more special.
Unique Variations of a Princess Cake (e.g., Pink Velvet or a Chocolate Princess Cake)
Creating unique variations of the traditional princess cake adds a fun and personalized twist to the classic design. Here are a few variations to consider:
1. Pink Velvet Princess Cake
A pink velvet cake adds an extra layer of elegance and color to your princess cake. This variation uses a soft, pink-hued velvet cake that’s rich and moist. It’s a delightful choice for a fairy tale princess theme, as the color can be paired perfectly with soft pastel decorations and fondant. The flavor is similar to red velvet, with a subtle tang that pairs wonderfully with cream cheese or buttercream frosting.
2. Chocolate Princess Cake
For chocolate lovers, a chocolate princess cake is a luxurious variation that never fails to impress. The deep, rich flavor of the chocolate cake contrasts beautifully with light, colorful frosting and fondant. This version can be decorated just like the classic princess cake, but with a darker twist. Consider pairing it with chocolate ganache or a creamy buttercream to keep the theme cohesive and delicious.
3. Carrot Cake Princess Cake
For a healthier take, a carrot cake princess cake offers a moist, spiced flavor with a bit of texture. This variation pairs well with cream cheese frosting, which enhances the cake’s natural flavors. Decorate with fondant or buttercream in vibrant colors to match the theme. Carrot cake can bring a unique twist while still keeping the princess feel.
4. Lemon Princess Cake
If you prefer a zesty option, a lemon princess cake provides a fresh and tangy flavor. The light, citrusy taste complements sweet buttercream or cream cheese frosting beautifully. Lemon cake pairs perfectly with pastel-colored decorations, creating a bright and cheerful princess cake that is ideal for spring or summer parties.
5. Vanilla and Berry Princess Cake
For a fruity and refreshing twist, try a vanilla cake with fresh berries, such as strawberries or raspberries, layered inside. The berries add a burst of color and flavor, while the vanilla cake provides a soft, classic base. This combination works well with light buttercream and is perfect for a birthday princess who loves fruity flavors.
6. Unicorn Princess Cake
Another creative variation is the unicorn princess cake. It incorporates multi-colored layers inside the cake (often pastel shades) and is decorated with a fondant unicorn topper. This cake combines the whimsical charm of a princess cake with the magic of unicorns, making it a great option for a playful birthday party.
These unique variations of the princess cake offer an exciting way to personalize your cake while still maintaining the princess theme. Whether you go for pink velvet, chocolate, or any other flavor, the choice of cake allows you to cater to different tastes while still keeping the magical, royal essence of a princess cake
For more creative cake ideas, don’t miss our detailed post on perfect Bluey cakes that are fun and easy to make.
Creating a beautiful princess cake is a fun and rewarding experience, whether you’re baking for a birthday, royal celebration, or fairy tale event. With the right cake base, frosting, decorations, and color choices, you can bring the magic of princesses to life. Experiment with unique variations like pink velvet or chocolate to make your cake stand out, and don’t forget the small details like edible glitter and toppers to add a magical touch. No matter your theme or flavor choice, your princess cake will surely be the centerpiece of any celebration, delighting both kids and adults alike with its royal charm. Happy baking!