
Looking for a fun and easy treat? Try this cookie and cream cake pop recipe! These bite-sized delights blend the rich flavor of cookies like Oreos with creamy cake and frosting. Dipped in smooth chocolate, they offer the ultimate sweet indulgence. Whether you’re hosting a party or craving a snack, these cake pops are sure to impress your guests. In this post, I’ll walk you through a simple recipe to make these delicious treats. Let’s dive in and create them together!
What Are Cookie and Cream Cake Pops?

What Are Cookie and Cream Cake Pops?
Cake pops are small, handheld treats made by mixing cake crumbs with frosting and shaping them into a ball. You then place the mixture on a stick and dip it in chocolate or candy melts. These bite-sized desserts quickly became popular for their fun presentation and ease of serving. Because they’re so versatile, cake pops work well at parties, birthdays, or casual get-togethers. They also offer endless opportunities for creativity, whether you’re experimenting with different flavors or decorations. Thanks to their portability and mess-free nature, cake pops are perfect for any occasion.
The Delicious Cookie and Cream Flavor Twist in Cake Pops
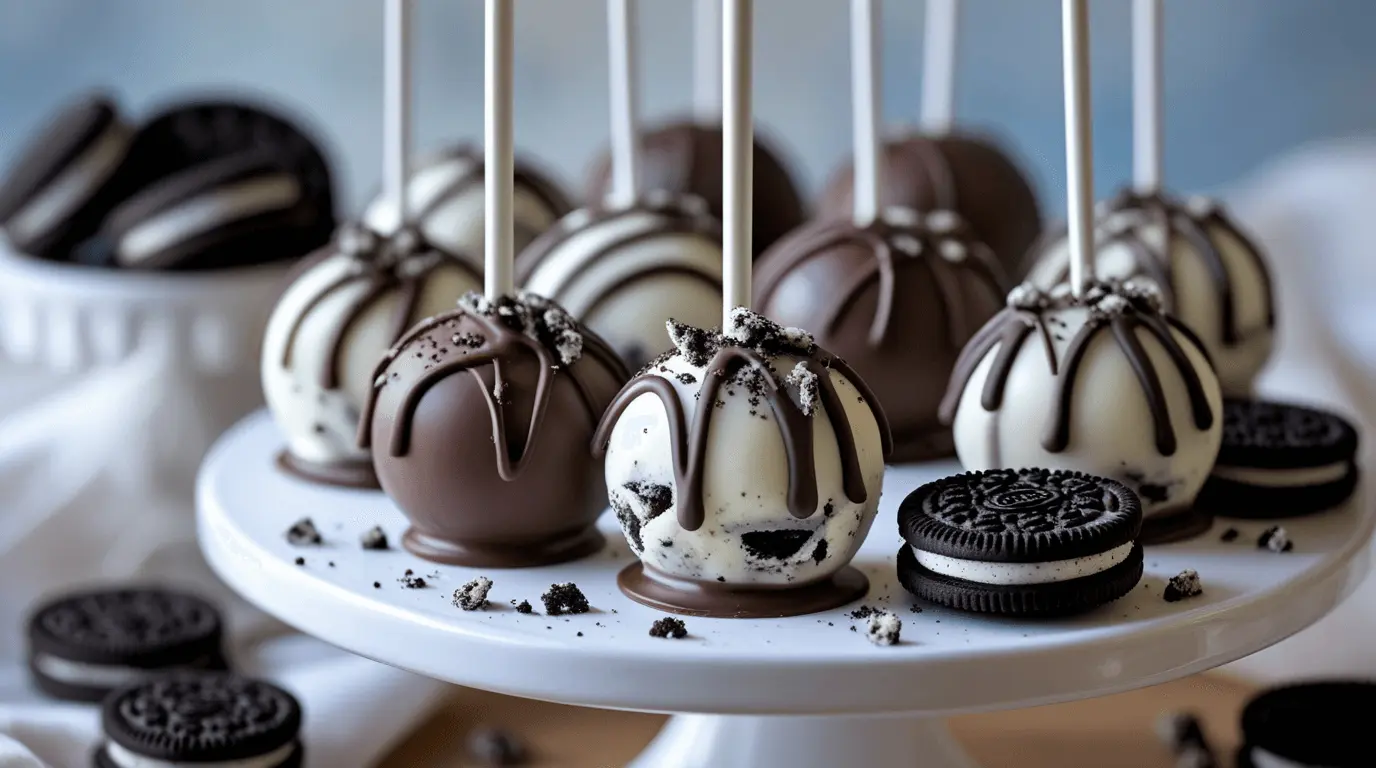
The combination of cookies, like Oreos, and cream creates a rich, satisfying flavor that takes cake pops to the next level. When you mix crushed cookies with cake crumbs and frosting, you infuse the cake pops with a delightful crunch and a burst of familiar, nostalgic taste. The creaminess from the frosting or cream cheese complements the cookies, balancing the textures for a smooth yet indulgent bite. This cookie and cream twist offers a unique flavor profile, making each cake pop an irresistible treat. Whether you use classic Oreos or other cookie varieties, this flavor combination always delivers a fun, decadent experience that’s perfect for any dessert table.
Perfect for Any Occasion
Cookie and cream cake pops are incredibly versatile, making them perfect for a variety of occasions. Whether you’re celebrating a birthday, a holiday, or a special event, these cake pops can be easily customized to match any theme. You can decorate them with vibrant colors, sprinkles, or even personalized toppers to suit the occasion. For a more casual treat, they make a delicious and fun snack for family gatherings or an afternoon pick-me-up. Their portable, no-mess nature makes them ideal for parties, and their bite-sized form means everyone can enjoy a sweet treat without the hassle of cutting slices. From festive gatherings to simple get-togethers, cookie and cream cake pops are a crowd-pleaser every time.
Essential Ingredients for Perfect Cookie and Cream Cake Pops
Cake Mix or Homemade Cake?
When it comes to making your cookie and cream cake pops, you have two options: using a cake mix or baking a homemade cake. Both methods work, but each offers unique benefits depending on your needs.
1. Cake Mix – Quick and Convenient
Using a box mix is the fastest way to get your cake pops started. With just a few ingredients and minimal preparation, you can have a cake ready in no time. Simply follow the instructions on the box, and you’re good to go. If you’re short on time or baking experience, this is your best option for a smooth, stress-free baking experience.
2. Homemade Cake – Richer, Fuller Flavor
If you prefer a more personalized touch, consider baking your cake from scratch. Homemade cakes, made with fresh ingredients, can offer a richer, more complex flavor that takes your cake pops to the next level. For a homemade cake, try a simple vanilla or chocolate recipe that pairs well with the cookie and cream filling. While it takes a bit more time, the results are worth it if you’re aiming for a unique, from-scratch taste.
Which One to Choose?
If you’re looking for speed and simplicity, go for the cake mix. However, if you want to impress with a custom flavor and are willing to spend a little extra time, homemade cake is the way to go. Either way, your cake pops will be delicious and delightful!
Cookie Crumbs: The Secret to Perfect Cookie and Cream Cake Pops
Crushed cookies, like Oreos, are the star ingredient when creating the irresistible cookie and cream flavor in your cake pops. Here’s why they play such an essential role:
1. Texture and Crunch
When you add crushed cookies to your cake pop mixture, they bring a satisfying crunch that contrasts perfectly with the softness of the cake and frosting. This texture combination makes each bite interesting and enjoyable. It’s the perfect balance of smooth and crunchy that makes cookie and cream cake pops stand out.
2. Flavor Explosion
The rich, chocolaty flavor of cookies like Oreos blends seamlessly with the creaminess of the cake and frosting. As the cookie crumbs dissolve into the cake mixture, they infuse the cake pop with a deep, nostalgic taste that’s both familiar and decadent. The cookie’s sweetness and slight bitterness from the chocolate perfectly complement the sweet, creamy filling.
3. How to Crush Cookies
To get the right texture, use a food processor to crush your cookies into fine crumbs. If you don’t have one, you can also place the cookies in a plastic bag and use a rolling pin to crush them manually. Aim for small, uniform crumbs so they mix well with the cake and frosting.
4. Customization
While Oreos are the classic choice, feel free to get creative with other cookies. You can experiment with chocolate chip cookies, biscotti, or even graham crackers to bring new flavors to your cake pops.
Frosting or Cream Cheese: Key Ingredients for Binding Your Cookie and Cream Cake Pops
To create the perfect cookie and cream cake pop recipe, you need the right binder to hold your cake and cookie crumbs together. This is where frosting or cream cheese comes in! Here’s how each option works to give your cake pops a smooth, creamy texture:
1. Buttercream Frosting – Sweet and Smooth
Buttercream frosting is a popular choice for binding your cake and cookie mixture. Its rich, sweet flavor adds moisture to the cake and gives your cookie and cream cake pops a smooth, soft texture. It helps the crumbs stick together while keeping the cake pops light and fluffy. Simply mix the frosting into your cake and cookie crumbs until the mixture is firm but moldable. The result? Perfectly round, smooth cake pops that hold their shape.
2. Cream Cheese – Tangy and Rich
If you prefer a slightly tangy flavor to balance the sweetness of the cake and cookies, cream cheese is an excellent choice. Its creamy, smooth consistency provides the same binding effect as buttercream but adds a richer, more complex flavor. Cream cheese also gives your cookie and cream cake pops a slightly denser texture, which some people prefer for a more indulgent bite.
How to Choose
For a classic, sweet cake pop, stick with buttercream frosting. If you want a more sophisticated twist on your cookie and cream cake pop recipe, try using cream cheese. Both options work wonders, but the flavor and texture are slightly different, so choose based on your preference.
4. Mixing Tips
Whichever you choose, be sure to mix the frosting or cream cheese in gradually. You want the mixture to be moist enough to mold into balls but not too wet. Start with a little frosting or cream cheese, and add more until you reach the perfect consistency for rolling your cake pops.
Cake Pop Coating – Chocolate or Candy Melts
The coating is what gives your cookie and cream cake pop recipe its glossy, delicious finish. Whether you choose chocolate or candy melts, dipping your cake pops in a smooth coating is essential for both flavor and presentation. Here’s how to do it:
1. Chocolate – Rich and Decadent
If you’re using chocolate for your cookie and cream cake pop recipe, choose high-quality chocolate chips or chunks for the best taste. Melt the chocolate gently using a double boiler or microwave in short bursts. Stir until it’s completely smooth and free of lumps. For easy dipping, make sure the melted chocolate is not too thick. If it’s too thick, add a small amount of vegetable oil to thin it out for a smoother dip.
2. Candy Melts – Colorful and Easy
Candy melts are a popular choice for cake pops due to their smooth consistency and bright, vibrant colors. They melt quickly and easily in the microwave, making them a convenient option. Once melted, stir to ensure it’s smooth and ready for dipping. If you want to add extra shine or make the coating more manageable, you can mix in a bit of shortening to thin it out.
Dipping Technique – Smooth and Even
To coat your cookie and cream cake pops evenly, dip each cake ball into the melted chocolate or candy melts. Hold the cake pop by the stick and submerge the cake ball fully into the coating. Gently tap the stick against the side of the bowl to remove any excess coating. This will help avoid drips and ensure a smooth, even layer around the cake pop.
4. Let it Set – Perfect Finish
After dipping, place your coated cake pops on a piece of parchment paper or a cake pop stand to allow the coating to set. If you’d like, you can add sprinkles, crushed cookies, or drizzles of another color of candy melt while the coating is still wet for extra decoration. Once the coating has hardened, your cookie and cream cake pops are ready to serve!
Step-by-Step Guide to Making Cookie and Cream Cake Pops

Step 1: Bake and Crumble the Cake
The first step in your cookie and cream cake pop recipe is baking the cake and crumbling it into fine pieces. This is where the magic happens, so follow these simple steps for the perfect texture:
1. Bake the Cake
Start by baking your cake according to your chosen recipe or cake mix. For the best results, opt for a classic vanilla or chocolate cake that pairs beautifully with the cookie and cream flavor. Once the cake is fully baked, allow it to cool completely on a wire rack. This prevents the cake from becoming soggy when mixed with frosting.
2. Crumble the Cake
Once the cake has cooled, it’s time to crumble it. Gently break the cake into pieces using your hands or a fork. Continue breaking it down into small, fine crumbs. This is key to achieving a smooth, cohesive texture for your cake pops. Aim for crumbs that are small enough to mix easily with frosting or cream cheese, but not so small that they turn into a powder.
3. Get a Consistent Texture
For an even crumb texture, you can pulse the cake pieces in a food processor for a few seconds. This step is optional but helps if you’re looking for the perfect, uniform crumb consistency. The finer the crumbles, the easier it will be to bind them together with the frosting later on.
Step 2: Mix Cake Crumbs and Frosting
This is the crucial step where you turn your cake crumbs into a dough-like consistency that can be easily shaped into perfect cookie and cream cake pops. Follow these simple steps to get the texture just right:
1. Add Frosting or Cream Cheese
Start by adding frosting (buttercream or cream cheese) to your crumbled cake. If you’re using buttercream, about 1/2 cup of frosting for every 2 cups of cake crumbs should be enough. For a tangier flavor, go for cream cheese. The amount of frosting may vary based on the size of your cake batch, but aim for a moist consistency not too wet or dry.
2. Mix Gently
Use a spoon or your hands to gently mix the cake crumbs and frosting together. You want to incorporate the frosting fully into the crumbs, but avoid over-mixing. The goal is to create a dough-like mixture that sticks together when pressed but doesn’t feel overly greasy or wet.
3. Test the Consistency
To check if the mixture is right, take a small portion and press it into a ball. If the ball holds its shape without crumbling, your mixture has the perfect consistency. In case it feels too crumbly, simply add a bit more frosting, one spoonful at a time. For a smoother texture, sprinkle in a few more cake crumbs if it becomes too sticky.
4. Achieve the Perfect Texture
Your cookie and cream cake pop recipe needs to be moldable but not too sticky. When mixed just right, the dough will easily form into balls without falling apart. This texture will ensure that your cake pops stay intact while dipping them in chocolate or candy melts.
Step 3: Form and Insert Cake Pop Sticks
This step brings your cookie and cream cake pop recipe to life by shaping the cake mixture into perfect balls and securing the sticks for easy handling. Here’s how to do it:
1. Shape the Cake Balls
Start by taking small portions of the cake mixture and rolling them into smooth, round balls. Make sure the balls are about 1 to 1.5 inches in diameter. You can use your hands or a cookie scoop for more uniform size. Gently roll and press the mixture together, ensuring it’s compact but not overly tight. This helps prevent cracking later.
2. Prepare the Sticks
Before inserting the cake pop sticks, dip the tip of each stick into a bit of melted chocolate or candy melts. This step helps the stick stay in place once it’s inserted into the cake ball. It acts like glue, ensuring the stick doesn’t slip out of the cake pop later.
3. Insert the Sticks
Carefully insert the dipped cake pop stick into the center of each cake ball, pushing it about halfway through. Don’t push the stick all the way through, as it may cause the cake ball to break apart. Ensure the stick is positioned straight and firmly in the center, giving the cake pop stability.
4. Handle with Care
Once all your cake balls have their sticks, place them on a tray or cake pop stand. Let the sticks set for a few minutes to ensure they stay securely in place. This will make the next steps coating and decorating much easier without the sticks shifting.
Step 4: Dip and Decorate
Now, let’s dive into the fun part—dipping and decorating your cookie and cream cake pops! This is where the magic happens, and your cake pops really come to life. Follow these easy steps to achieve a smooth, polished finish:
1. Prepare the Dipping Chocolate
First, melt your chocolate or candy melts. You can use a microwave or double boiler method for this. If you’re using a microwave, heat the chocolate in 20-second intervals, stirring each time until it’s completely melted and smooth. Alternatively, when using candy melts, add a teaspoon of vegetable oil to help thin the mixture for a smoother dip.
2. Dip the Cake Pops
Next, carefully dip each cake pop into the melted chocolate or candy melts, holding the stick. Be sure to submerge the cake ball only up to the stick to avoid any mess. After dipping, gently tap the stick to remove any excess coating. This ensures a smooth, even layer without any drips.
3. Add Decoration
While the chocolate coating is still soft, it’s time to decorate! You can roll the cake pop in crushed cookie crumbs (like Oreos) for that signature cookie and cream cake pop flavor. Alternatively, sprinkle colorful candy, rainbow sprinkles, or even edible glitter for a festive touch. This is where you can get creative, so feel free to experiment with different toppings and designs!
4. Let Them Set
Finally, place your decorated cake pops upright in a cake pop stand or a styrofoam block. Let them sit for 10 to 30 minutes to allow the coating to fully set. Once they’re dry, you’re ready to serve and enjoy your beautiful, delicious cookie and cream cake pops.
Tips and Tricks for Making Perfect Cookie and Cream Cake Pops

Use a Cake Pop Stand for Easy Display
To ensure your cookie and cream cake pops look as good as they taste, using a cake pop stand is a game-changer! Not only does it help keep your cake pops upright, but it also prevents any mess during the drying process. Here’s how to make the most out of this handy tool:
1. Choose the Right Stand
You can find cake pop stands in various shapes and sizes, from simple foam blocks to multi-tiered stands for larger batches. The key is to select one that fits the number of cake pops you’re making and provides enough space for each pop to stand securely. Foam blocks are a budget-friendly option, while decorative stands can add a touch of elegance for parties or events.
2. Insert the Cake Pops
Once your cake pops are dipped and decorated, gently insert the stick into the holes of the stand. Be sure to place the cake pops upright with enough space between them to prevent them from touching or toppling over. This ensures the coating has space to fully set without interference, giving you a smooth, clean finish.
3. Prevent Drips and Mess
A cake pop stand is perfect for preventing excess chocolate or candy melts from dripping onto the surface below. With the pops upright, the coating will set evenly without pooling at the bottom, which can create unsightly marks or uneven coverage.
4. Let Them Dry Completely
Place your stand in a cool, dry area to let the cake pops set. Depending on the coating you’ve used, it may take anywhere from 10 to 30 minutes for the chocolate to harden fully. The cake pop stand keeps them in place, so you won’t have to worry about handling them until they’re ready.
Use a Cake Pop Stand for Easy Display
A cake pop stand is your secret weapon for achieving a clean, professional look when making cookie and cream cake pops. It’s not only practical but also helps your pops look great during the drying process. Here’s why you should use one:
1. Keeps Cake Pops Upright
Once you’ve dipped and decorated your cake pops, the last thing you want is for them to tilt or fall over. A cake pop stand holds each pop upright, preventing the coating from smudging or dripping. This ensures your cake pops retain their beautiful shape while drying.
2. Prevents a Mess
Without a stand, the cake pops may rest on a flat surface, causing excess coating to spill or even stick to the tray. A stand eliminates this issue, allowing the pops to dry evenly without any messy mishaps. The result? Clean, flawless cake pops ready for display or serving.
3. Adds a Decorative Touch
Not only is a cake pop stand practical, but it also adds a charming touch to your presentation. Whether it’s for a party or a gift, a stand elevates your cake pops, making them look even more enticing. You can find stands in various styles, from simple to decorative, to match the theme of your event.
4. Easy Access and Handling
Using a stand also makes it easier to handle the cake pops. You won’t have to worry about them rolling around or getting damaged while they set. Plus, when serving at a party, guests can easily grab a pop from the stand without worrying about it falling apart.
How to Store Cake Pops
Storing your cookie and cream cake pops properly is essential to keeping them fresh and delicious for as long as possible. Here’s a simple guide to ensure they stay in perfect condition:
1. Let Them Cool Completely
Before storing your cake pops, make sure they have cooled and the chocolate or candy coating has fully set. This prevents any smudging or mess when handling them. Allow at least 30 minutes for the coating to harden before moving to the next step.
2. Use an Airtight Container
To keep your cake pops fresh, store them in an airtight container. This will protect them from air exposure, which can dry out the cake inside. Arrange the cake pops in a single layer or place parchment paper between layers to avoid them sticking to one another.
3. Refrigerate or Room Temperature?
Cake pops can be stored in the fridge for up to 1 week. If you plan to refrigerate them, make sure they’re fully wrapped and stored in an airtight container to prevent them from absorbing odors from other foods. Alternatively, if you prefer to keep them at room temperature, they’ll last for 3 to 4 days in a cool, dry place. Just be sure not to expose them to heat, as it could melt the coating.
4. Freezing for Long-Term Storage
If you want to keep your cookie and cream cake pops for a longer period, you can freeze them! Simply place them in a freezer-safe container or wrap each one individually in plastic wrap, followed by foil. Freeze for up to 1 month. When you’re ready to enjoy them, let them thaw in the fridge for a few hours before serving.
Conclusion
This cookie and cream cake pop recipe is a fun and versatile treat, perfect for any occasion. You can easily customize it with different coatings and decorations to make it your own. These cake pops are a hit for parties and family gatherings, offering both style and delicious flavor.
Try the recipe, get creative, and share your creations with loved ones. For more tasty ideas, check out our Ghirardelli Chocolate Chip Cookie Recipe.