
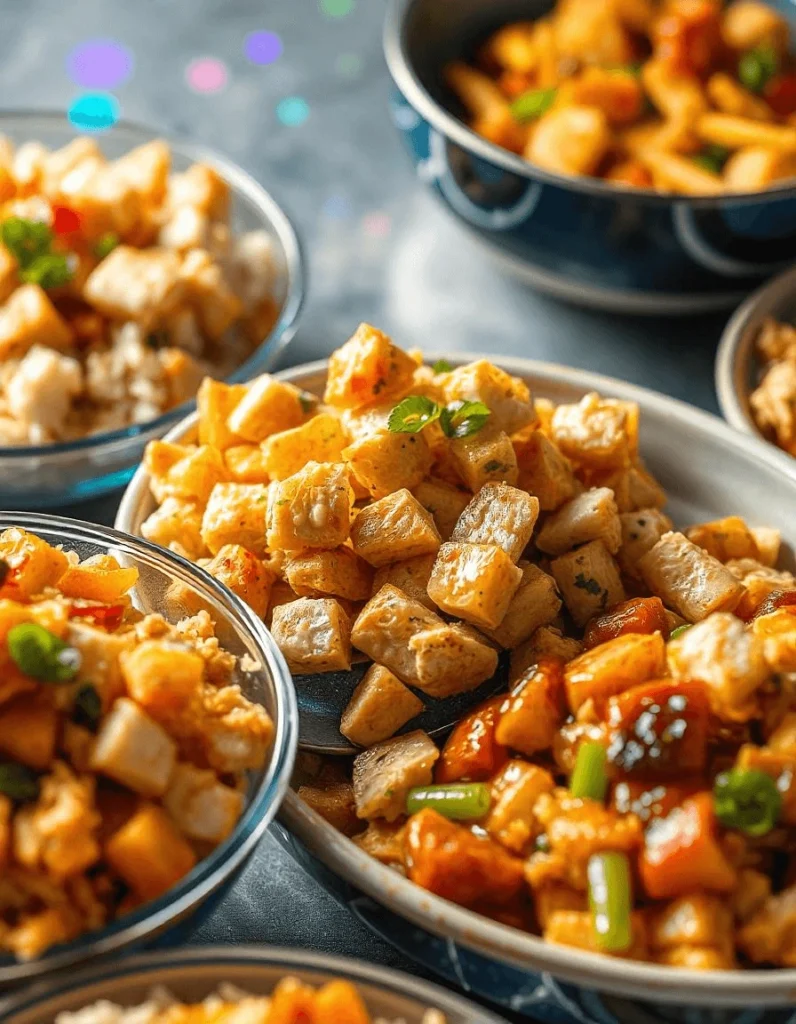
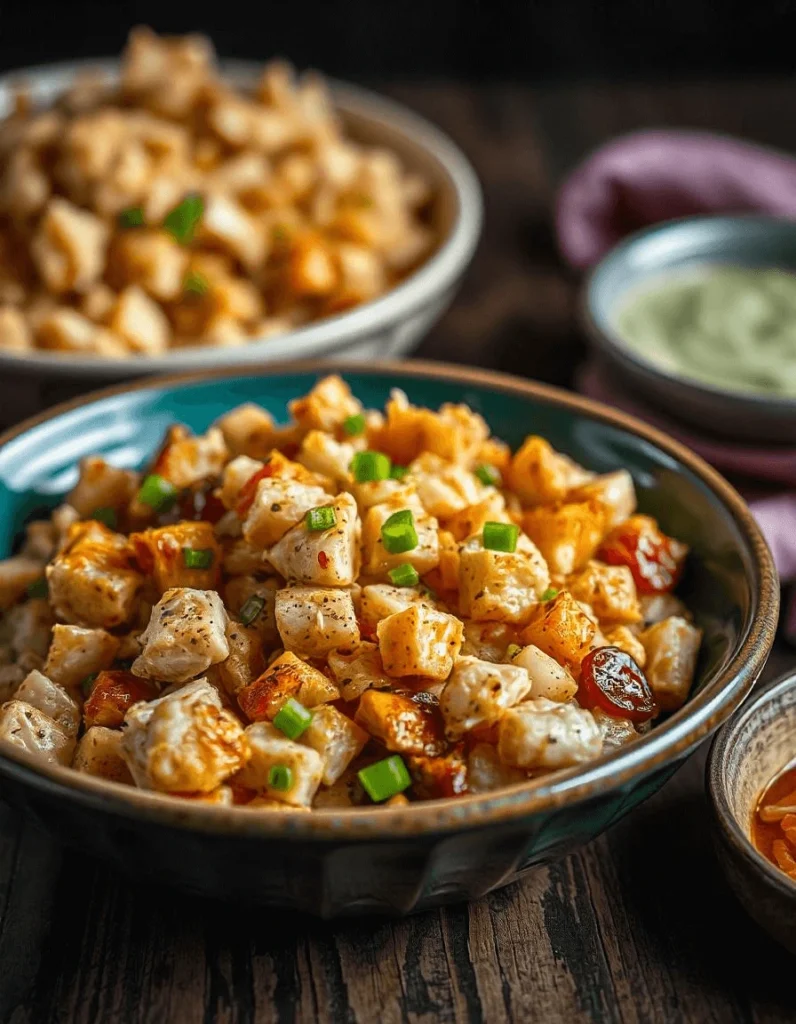
Diced chicken is a versatile ingredient for quick and easy meals. Whether you’re making a stir-fry, salad, or rice bowl, it can be added to many dishes. Perfecting diced chicken recipes is simple when you know the best techniques for cutting and cooking. In this post, we’ll show you how to dice chicken like a pro and share some delicious recipes. These easy diced chicken meals are sure to make your weeknight dinners a breeze. Try them out and enjoy satisfying, flavorful dishes every time.
Essential Tips for Perfectly Dicing Chicken
Choosing the Best Chicken Cut for Diced Chicken Recipes
Selecting the right chicken cut is crucial to achieving the perfect diced chicken. Different cuts offer varying flavors and textures, so it’s important to know which one works best for your dish. Here’s a closer look at the top chicken cuts for diced chicken recipes:
Why Chicken Breast is Perfect for Diced Chicken Recipes:
- Chicken breast is lean, tender, and quick to cook, making it a favorite for diced chicken recipes. It’s incredibly versatile, absorbing a wide range of flavors from marinades and seasonings. This cut is ideal when you need a healthy option that still delivers great taste.
- Best for: Stir-fries, salads, rice bowls, and tacos—diced chicken breast is perfect for dishes that require fast, flavorful cooking.
Why Chicken Thighs Add Flavor to Diced Chicken Dishes:
- If you want a richer, more savory flavor, chicken thighs are a great choice. They have a higher fat content, which makes them juicier and more flavorful than chicken breast. Although they take a bit longer to cook, diced chicken thighs offer a satisfying depth of flavor that’s hard to beat.
- Best for: Casseroles, slow-cooked dishes, or hearty stir-fries where moisture and flavor are key.
Chicken Tenderloins: A Quick and Tender Choice for Diced Chicken Recipes:
- Chicken tenderloins are naturally tender and easy to dice, making them another excellent option for your diced chicken recipes. These cuts cook quickly, which makes them perfect for last-minute meals.
- Best for: Stir-fries, wraps, and salads—any dish where tender, bite-sized chicken is needed fast.
Boneless vs. Bone-In Chicken: What’s Best for Diced Chicken Recipes?
Boneless chicken is ideal for quick, efficient diced chicken recipes, while bone-in chicken provides a deeper, more complex taste when you’re willing to spend a little more time in the kitchen., making your meals even more enjoyable.
For convenience, boneless cuts like chicken breast or thighs are easier to dice and require less preparation. Bone-in cuts, on the other hand, may take longer to cook and need to be deboned before dicing, but they often offer richer flavors.
How to Dice Chicken Like a Pro
Dicing chicken might seem simple, but there’s a technique that ensures even pieces that cook perfectly every time. Mastering this technique will help you create tender and juicy diced chicken for any recipe. Follow these steps to dice chicken like a pro:
Step 1: Choose the Right Knife
A sharp knife is crucial when dicing chicken. A chef’s knife or boning knife works best, allowing for clean, precise cuts. If your knife is dull, it can crush the meat, leading to uneven pieces. A sharp knife will make the dicing process faster and more efficient.
Step 2: Prepare Your Chicken
Chilled chicken is easier to dice, as it holds its shape better than room-temperature chicken. Trim any excess fat or skin, especially when using chicken thighs. This ensures your diced chicken is lean and free of chewy bits.
Step 3: Slice the Chicken into Strips
Cutting against the grain is essential to make the chicken tender. Start by slicing the chicken into strips, ensuring each strip is roughly 1/2 inch wide. These strips will form the foundation of your diced chicken pieces.
Step 4: Dice the Strips into Even Pieces
Once you have the strips, rotate them and slice across to create uniform cubes. Aim for equal-sized pieces to ensure they cook evenly. If you prefer smaller cubes, slice the strips thinner before dicing.
Step 5: Use a Non-Slip Cutting Board
A stable cutting board is important for safety and precision. A non-slip surface helps you cut cleanly without the board sliding around. Place a damp towel underneath the cutting board to prevent movement, ensuring a safer and more efficient cutting process.
Step 6: Inspect and Adjust
After dicing, check the chicken pieces for uniformity. Uneven pieces can result in some parts being overcooked while others are undercooked. Trim any irregularly shaped pieces to match the rest, ensuring that everything cooks evenly.
Pro Tip: Clean Tools for Safety
To prevent cross-contamination, always use separate cutting boards and knives for raw chicken and other ingredients. Wash your hands thoroughly after handling raw chicken, and clean your tools immediately after use to maintain a hygienic kitchen.
Best Time to Dice Chicken for Diced Chicken Recipes
Timing plays a crucial role in how your diced chicken turns out. Whether you’re prepping for a stir-fry or a casserole, knowing when to dice your chicken ensures that it cooks evenly and stays tender. Here are the best times to dice chicken to get the most out of your diced chicken recipes:
Dice Chicken Before Cooking for Faster, Even Cooking
- Why it’s ideal: Dicing chicken before cooking allows it to cook faster and more evenly. Small pieces of chicken also absorb marinades or seasoning better, ensuring each bite is flavorful. By cutting the chicken into smaller chunks, you create an ideal texture and cooking time for many dishes.
- Best for: Stir-fries, tacos, salads, and any recipe that requires small, evenly-cooked pieces of chicken. Pre-diced chicken works particularly well for recipes that need quick cooking.
After Cooking: Dicing Chicken for Juiciness and Flavor
- Why it works: If you want to preserve moisture and juiciness, dicing chicken after it’s been cooked is a great option. Cooking the chicken first locks in the juices, making it easier to cut without losing tenderness. This method works particularly well for thicker cuts, such as chicken thighs or bone-in chicken, that benefit from cooking whole before dicing.
- Best for: Chicken soups, casseroles, or recipes where the chicken needs to remain moist. Dicing cooked chicken ensures that the meat stays tender and doesn’t dry out.
Chill or Freeze Chicken for Easier Dicing
- Why it’s helpful: Slightly frozen or chilled chicken is firmer, making it easier to slice into strips and then dice into uniform pieces. This method results in cleaner cuts and prevents the chicken from becoming mushy while you work. It’s especially useful when you’re preparing a large quantity of chicken or need the pieces to be perfectly even.
- Best for: Meal prepping, stir-fries, and salads where you need evenly diced chicken. If you’re working with a large batch, chilling or briefly freezing the chicken will save you time and effort while ensuring consistent cuts.
Timing for Safety: Storing Diced Chicken Properly
- Keep it fresh: For food safety, dice chicken just before cooking or shortly after it has been thawed. Store any pre-diced chicken in the refrigerator for up to 1–2 days or freeze it for longer storage. Always make sure to handle and store chicken properly to avoid contamination.
- Best for: Prepping chicken in advance for quick meals. Whether you’re freezing it for later or using it within a couple of days, proper storage ensures that your diced chicken stays safe and fresh until you’re ready to cook.
Pro Tip: Don’t Overdice Chicken for the Perfect Texture
- Size matters: When dicing chicken, avoid making the pieces too small. Diced chicken should be uniform in size to ensure even cooking, but overly small pieces can become dry or tough. A good rule of thumb is to aim for bite-sized cubes that will hold their shape throughout the cooking process.
- Best for: Any recipe where you want tender chicken that doesn’t overcook. The right size will keep your diced chicken juicy and flavorful in every bite.
For more ideas on cooking chicken perfectly, visit this expert guide on grilling chicken
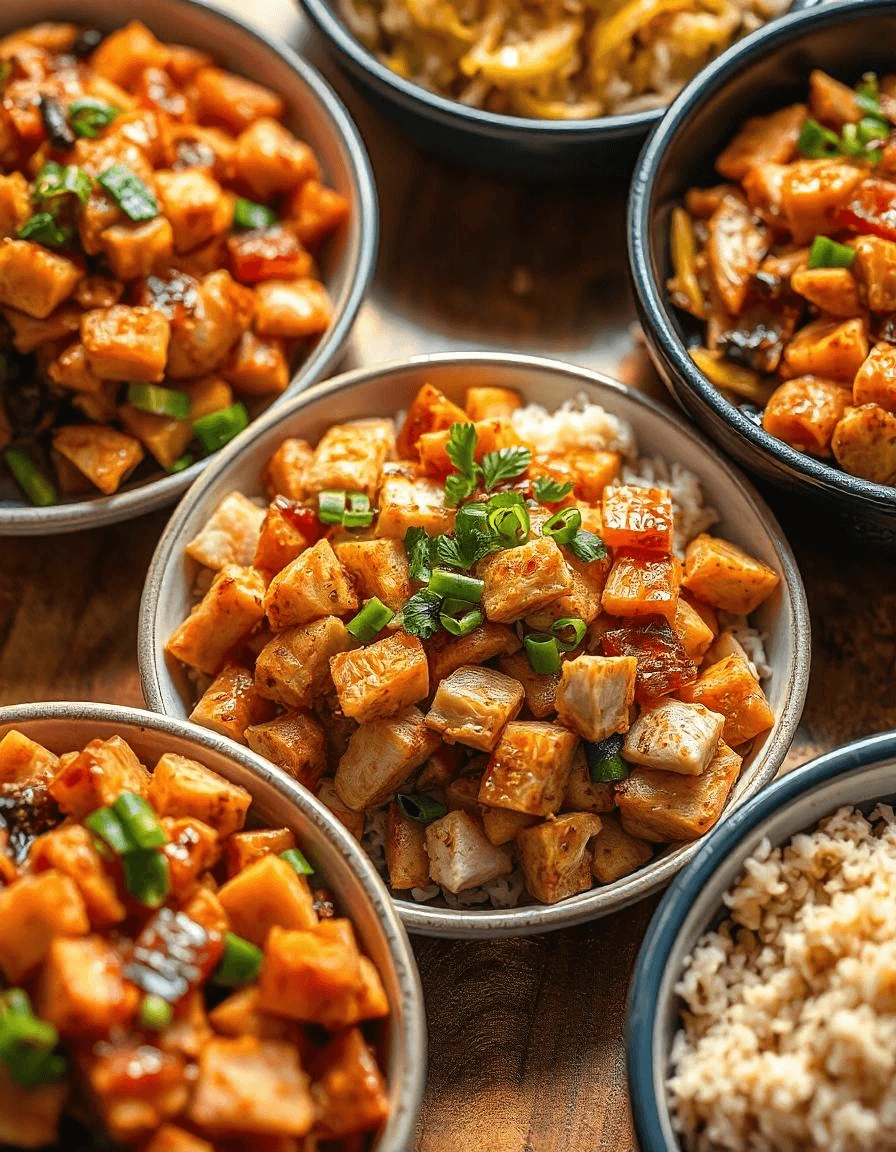
Quick and Easy Diced Chicken Recipes for Weeknights
Diced Chicken Stir-Fry: A Step-by-Step Guide
Stir-frying diced chicken is a quick and easy way to create a delicious, healthy meal packed with flavor and vegetables. The high heat of stir-frying seals in the juices of the chicken, making it tender while allowing the vegetables to retain their crunch. Follow this step-by-step guide to create the perfect diced chicken stir-fry:
Step 1: Prepare Your Ingredients
Begin by dicing your chicken into uniform pieces, about 1/2 inch in size, ensuring even cooking. Choose your vegetables, such as bell peppers, carrots, onions, broccoli, snap peas, and mushrooms. Chop them into bite-sized pieces, matching the size of the chicken for consistent cooking. Prepare your stir-fry sauce, which should include soy sauce, garlic, ginger, sesame oil, and a touch of rice vinegar. Having the sauce ready will make the process seamless once you start cooking.
Step 2: Cook the Chicken
To cook the chicken, heat a wok or large skillet over medium-high heat. Add a tablespoon of vegetable oil (or sesame oil for extra flavor), and let it heat up. Next, add half of the diced chicken to the pan, ensuring not to overcrowd it. Stir occasionally, cooking the chicken until golden and fully cooked through. Once done, remove it from the pan and set it aside. Repeat with the remaining chicken.
Step 3: Stir-Fry the Vegetables
After the chicken is cooked, use the same pan to sauté garlic and ginger until fragrant, about 30 seconds to 1 minute. Then, add the harder vegetables, like carrots or broccoli, and stir-fry them for 2-3 minutes until they start to soften. Add the softer vegetables, such as bell peppers, onions, and snap peas, and continue to stir-fry for another 2-3 minutes. The vegetables should be tender but still crisp, providing a perfect contrast to the tender chicken.
Step 4: Combine Chicken and Vegetables
Once the vegetables are cooked to your liking, return the diced chicken to the pan. Stir everything together, ensuring the chicken is well mixed with the vegetables. At this point, add your stir-fry sauce and any additional seasonings, such as soy sauce or hoisin sauce. Stir-fry the mixture for another 1-2 minutes to coat the ingredients evenly and allow the flavors to meld.
Step 5: Finish with Garnishes
To elevate the dish, sprinkle sesame seeds, chopped green onions, or fresh cilantro over the top. A squeeze of lime juice or a dash of chili flakes can add a burst of acidity or heat, depending on your preferences. Serve your stir-fry immediately over rice, noodles, or cauliflower rice for a healthier alternative. It’s best enjoyed fresh, though it also makes excellent leftovers.
Pro Tip: Stir-Fry Variations
- Spicy stir-fry: Add red chili peppers or chili paste for an extra kick.
- Sweet stir-fry: Consider adding pineapple chunks or hoisin sauce for sweetness.
- Low-sodium stir-fry: Opt for low-sodium soy sauce or tamari to reduce the salt content while maintaining flavor.
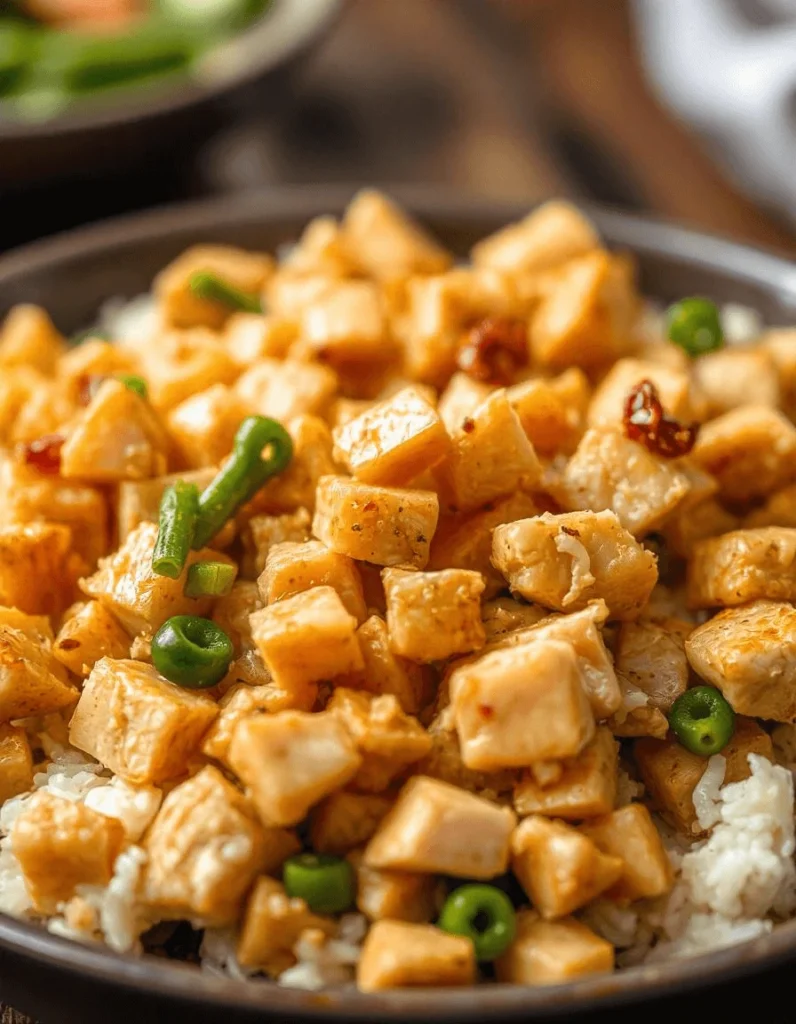
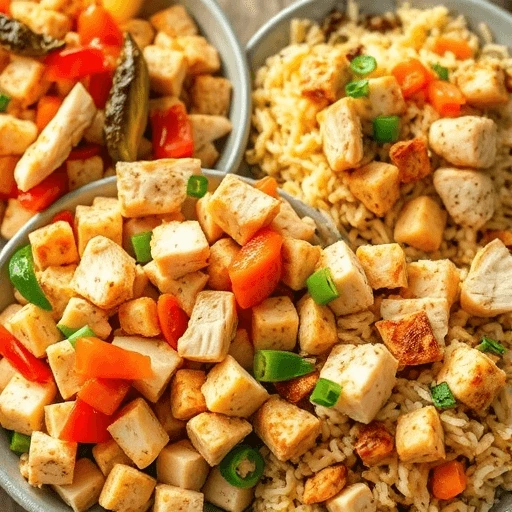
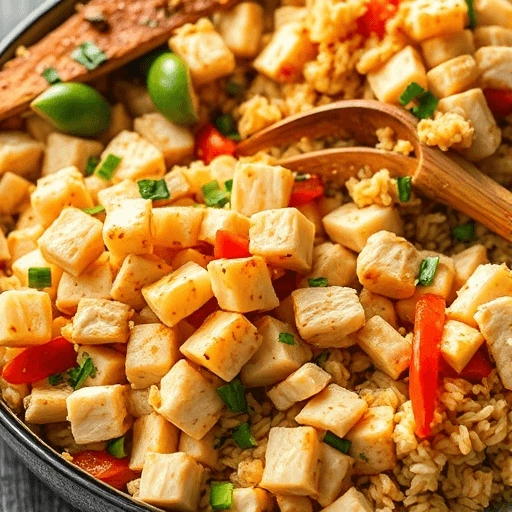
Chicken and Rice Bowls: A Simple, Customizable Meal
Chicken and rice bowls are a perfect choice for a quick, nutritious, and versatile meal. You can easily customize the ingredients to fit your taste preferences or dietary needs. The combination of tender, diced chicken, fluffy rice, and fresh toppings creates a balanced meal that’s filling yet light. Follow these steps to make a delicious chicken and rice bowl at home.
Step 1: Cook the Rice
Start by choosing your preferred type of rice. White rice, brown rice, jasmine, or even cauliflower rice can all work well in chicken and rice bowls.
- White rice: If you’re using white rice, rinse it first to remove excess starch and then cook it according to the package instructions.
- Brown rice: Brown rice offers a chewier texture and more fiber but takes longer to cook, usually around 40–45 minutes.
- Cauliflower rice: For a low-carb option, cauliflower rice is a great substitute. You can find it pre-made or make your own by grating cauliflower and sautéing it lightly.
Once your rice is ready, fluff it with a fork and set it aside while you prepare the chicken and toppings.
Step 2: Cook the Chicken
For your chicken, boneless, skinless chicken breasts or thighs work best. Dice the chicken into bite-sized pieces to ensure they cook quickly and evenly. Season the chicken with your choice of spices or marinades. A simple combination of salt, pepper, garlic powder, and paprika works wonders, but you can also use marinades such as teriyaki, soy sauce, or a zesty lime dressing.
- Sautéing: Heat a bit of olive oil in a large skillet or wok over medium-high heat. Add the diced chicken and cook for 6-8 minutes, stirring occasionally, until golden brown and cooked through.
- Grilling: Alternatively, grill the chicken pieces for a smoky flavor. Grill the chicken for about 3-4 minutes per side until the internal temperature reaches 165°F (74°C).
- Baking: For an easy, hands-off approach, you can bake the chicken in the oven at 375°F (190°C) for 25-30 minutes, then dice it into bite-sized pieces.
Once cooked, set the chicken aside and let it rest for a few minutes before adding it to the bowl.
Step 3: Assemble the Chicken and Rice Bowl
Now comes the fun part—assembling your chicken and rice bowl! Start by placing a serving of rice at the bottom of your bowl. Then, layer your diced chicken on top. From here, you can add your favorite toppings to bring the dish to life. Some popular options include:
- Fresh veggies: Add sliced avocado, cucumber, or shredded carrots for extra texture and freshness.
- Greens: Toss in some spinach, arugula, or mixed greens to give your bowl a healthy boost.
- Pickled vegetables: Pickled onions, radishes, or cucumbers add a tangy contrast to the dish.
- Crunchy elements: Add some crushed nuts (like almonds or peanuts), sesame seeds, or crispy fried onions for an added crunch.
- Sauces and dressings: Drizzle your favorite sauce or dressing over the top to enhance the flavor. Options include ranch, tahini, spicy mayo, or a simple soy sauce-based dressing.
Step 4: Add Seasoning and Garnishes
For extra flavor, sprinkle some seasonings on top of your chicken and rice bowl. You can use:
- Salt and pepper: The basics always enhance the taste.
- Herbs: Fresh cilantro, parsley, or basil can add a burst of freshness.
- Spices: If you like a bit of heat, consider adding chili flakes, smoked paprika, or a dash of cumin for a touch of warmth.
Don’t forget to garnish with a squeeze of lime for a burst of citrus or a drizzle of hot sauce if you want some extra spice!
Step 5: Serve and Enjoy
Once you’ve assembled and garnished your chicken and rice bowl, it’s ready to serve. This dish is perfect for meal prepping, as you can easily store individual bowls in the fridge for a quick, healthy meal throughout the week.
Pro Tip: Customizing Your Chicken and Rice Bowl
- For a Southwest-inspired bowl: Add black beans, corn, chopped tomatoes, and a dollop of guacamole or salsa.
- For an Asian twist: Top your bowl with steamed edamame, sliced scallions, and a drizzle of teriyaki sauce or soy sauce.
- For a Mediterranean vibe: Use ingredients like feta cheese, olives, hummus, and a sprinkle of oregano for a light, Mediterranean-inspired chicken bowl.
Chicken Salad with Diced Chicken: A Fresh and Flavorful Meal
Chicken salad with diced chicken is a versatile and satisfying dish that combines tender chicken, crisp vegetables, and a creamy dressing for a refreshing meal. Whether you enjoy it as a light lunch, a side dish, or a hearty dinner, this chicken salad is perfect for any occasion. Follow these steps to create a delicious and customizable chicken salad that’s sure to please everyone.
Step 1: Prepare the Diced Chicken
Start by cooking your chicken. Boneless, skinless chicken breasts or thighs are ideal for this recipe, as they’re easy to dice and provide a tender texture. You can either grill, bake, or sauté the chicken. Here’s a quick guide:
- Grilling: Marinate the chicken with olive oil, salt, pepper, and any other seasonings you like (garlic powder, paprika, lemon zest). Grill for 6-7 minutes per side until fully cooked and no longer pink in the center. Let the chicken rest before dicing it into bite-sized cubes.
- Baking: Season the chicken with your favorite spices and bake it at 375°F (190°C) for 25-30 minutes, then chop it into cubes.
- Sautéing: Heat a bit of oil in a skillet over medium heat, then cook the chicken pieces for about 6-8 minutes until golden and fully cooked. Let the chicken cool before dicing it into bite-sized pieces.
Step 2: Chop Fresh Vegetables
A great chicken salad incorporates a variety of fresh vegetables that add crunch, color, and nutrients. Here are some common veggies that pair well with diced chicken in a salad:
- Lettuce: Romaine, spinach, arugula, or mixed greens create a fresh base for your salad.
- Cucumber: Dice or slice cucumber for a cool, crisp texture.
- Tomatoes: Cherry or grape tomatoes add a juicy burst of flavor.
- Red onions: Thinly slice red onions for a bit of sharpness.
- Celery: Chopped celery adds crunch and a subtle, refreshing flavor.
- Bell peppers: Sweet bell peppers add both color and crunch to your salad.
Feel free to mix and match any vegetables based on your preferences or what you have on hand.
Step 3: Create the Creamy Dressing
A flavorful, creamy dressing is what ties the chicken salad together. You can make a simple dressing with a few ingredients, or get creative by adding herbs or spices. Here’s a basic dressing recipe:
- Classic mayo-based dressing: Combine 1/2 cup of mayonnaise, 2 tablespoons of Dijon mustard, 1 tablespoon of lemon juice or vinegar, and a pinch of salt and pepper. Whisk together until smooth. For added creaminess, you can mix in a tablespoon of Greek yogurt.
- Greek yogurt dressing: For a lighter option, swap out the mayo for Greek yogurt. Mix 1/2 cup of Greek yogurt with 1 tablespoon of olive oil, 1 tablespoon of lemon juice, and a pinch of salt and pepper. Add fresh herbs like dill or parsley for extra flavor.
- Avocado dressing: For a healthy, creamy dressing, blend a ripe avocado with 1 tablespoon of olive oil, 1 tablespoon of lime juice, and a pinch of salt. This dressing is rich and creamy while being dairy-free.
Feel free to adjust the amount of dressing based on how creamy or tangy you like your salad.
Step 4: Combine the Ingredients
Once your chicken and vegetables are prepared, it’s time to combine everything. Start by placing your chopped lettuce or greens in a large bowl, followed by the diced chicken and your chosen vegetables. Pour the dressing over the top, then gently toss everything together until evenly coated. Be careful not to overdress the salad—add a little at a time and taste as you go to avoid making it too creamy or tangy.
Step 5: Add Toppings and Garnishes
To take your chicken salad to the next level, add some tasty toppings and garnishes. Consider these ideas:
- Cheese: Crumbled feta, shredded cheddar, or goat cheese add a rich, savory flavor to your salad.
- Nuts and seeds: Toasted almonds, walnuts, or sunflower seeds give the salad a delightful crunch.
- Fruit: Add some sweetness with diced apples, grapes, or cranberries. These fruits pair beautifully with the savory chicken and creamy dressing.
- Hard-boiled eggs: For extra protein and richness, slice or chop a hard-boiled egg and sprinkle it on top of the salad.
- Croutons: For crunch, add homemade or store-bought croutons to your salad.
Step 6: Serve and Enjoy
Once you’ve tossed the salad and added your toppings, it’s ready to serve! Chicken salad with diced chicken is a versatile dish, so it can be served in many ways:
- As a main dish: Serve the salad in a large bowl with some crusty bread on the side for a filling lunch or dinner.
- In a sandwich or wrap: For a lighter, handheld option, spoon the salad into a whole-wheat wrap or between slices of bread.
- On top of greens: If you’re looking for a low-carb option, serve the chicken salad on top of extra leafy greens for a delicious salad bowl.
Pro Tip: Variations on Chicken Salad with Diced Chicken
- Mediterranean-style chicken salad: Add Kalamata olives, cucumbers, cherry tomatoes, and feta cheese. Dress with olive oil and lemon juice for a Mediterranean flair.
- Curry chicken salad: Add a teaspoon of curry powder to your dressing for a warm, spiced flavor. You can also toss in some raisins or chopped apples for sweetness.
- Bacon and avocado chicken salad: Add crumbled bacon and creamy avocado slices for a rich, indulgent twist on the classic chicken salad.
Flavorful Diced Chicken Marinades for Extra Taste
Garlic and Lemon Marinade: A Flavorful and Simple Recipe
A garlic and lemon marinade is a quick and easy way to make your diced chicken taste amazing. The combination of fresh lemon juice and garlic gives the chicken a zesty, savory flavor that works perfectly in many dishes. Here’s a step-by-step guide to making a garlic and lemon marinade that will take your chicken recipes to the next level!
Step 1: Gather the Ingredients
To make this marinade, you’ll need just a few simple ingredients:
- Lemon juice: Fresh lemon juice adds a tangy, citrusy taste and helps tenderize the chicken.
- Garlic: Mince or crush a few garlic cloves for a strong, aromatic flavor.
- Olive oil: Helps the marinade coat the chicken and keeps it moist while cooking.
- Salt and pepper: These basic seasonings bring out the natural flavors of the chicken.
- Optional extras: Add herbs like thyme, oregano, or parsley for extra flavor. You can also throw in a pinch of red pepper flakes if you like a little heat.
Here’s a simple recipe to follow:
- 1/4 cup fresh lemon juice
- 1/4 cup olive oil
- 4 cloves garlic, minced
- 1 teaspoon salt
- 1/2 teaspoon black pepper
- Optional: 1 teaspoon dried oregano, 1/2 teaspoon red pepper flakes, or fresh parsley
Step 2: Mix the Marinade
In a bowl or jar, combine all the ingredients. Whisk or shake until everything is mixed well. The olive oil and lemon juice should blend together into a smooth mixture.
Step 3: Marinate the Chicken
Now, coat your chicken with the marinade. Whether you’re using chicken breasts, thighs, or diced chicken, make sure each piece is fully covered. You can place the chicken and marinade in a resealable bag or shallow dish. Seal it tightly and refrigerate for at least 30 minutes (or up to 2 hours). If you have time, marinate the chicken overnight for even more flavor!
Step 4: Cook the Chicken
After marinating, take the chicken out of the fridge and let it sit at room temperature for 10-15 minutes. This helps it cook evenly. Now, you can cook your chicken however you prefer:
- Grilling: Preheat your grill to medium-high. Grill the chicken for 6-8 minutes per side until fully cooked.
- Sautéing: Heat olive oil in a pan over medium-high heat and cook the chicken for 6-8 minutes, stirring occasionally.
- Baking: Preheat your oven to 375°F (190°C) and bake the chicken for 25-30 minutes, or until it’s cooked through.
- Roasting: Roast the chicken in a preheated oven at 400°F (200°C) for 20-25 minutes, or until it’s golden brown on the outside.
Step 5: Serve and Enjoy
Once the chicken is cooked, let it rest for a few minutes before serving. You can serve garlic and lemon-marinated chicken with:
- Salads: Add it to a fresh salad for a healthy meal.
- Rice or grains: Pair it with rice, quinoa, or couscous.
- Wraps or sandwiches: Put the chicken in a wrap or sandwich for a quick lunch.
This garlic and lemon-marinated chicken is perfect for many different dishes, so feel free to get creative!
Pro Tip: Customize Your Marinade
You can easily change up this garlic and lemon marinade to suit your tastes:
- Add sweetness: Add a tablespoon of honey or maple syrup to balance the tartness of the lemon.
- Spicy version: Add chili flakes or cayenne pepper to give the marinade some heat.
- Yogurt marinade: Add a couple of tablespoons of yogurt to make the marinade creamy and tangy.
- Fresh herbs: Experiment with herbs like basil or mint for a new twist.
Honey Mustard Marinade: Sweet and Tangy Flavor
Honey mustard marinade combines the sweetness of honey with the tangy taste of mustard. This easy-to-make marinade adds great flavor to diced chicken. It’s perfect for grilling, baking, or sautéing your chicken and gives it a delicious, golden color and a sweet yet tangy taste.
Step 1: Gather Your Ingredients
Here’s what you’ll need for the marinade:
- Honey: Adds sweetness and helps the chicken get a golden, caramelized color as it cooks.
- Mustard: Dijon mustard works best because it’s tangy and smooth, but you can also use yellow mustard if you prefer.
- Olive oil: Helps coat the chicken and keeps it moist during cooking.
- Apple cider vinegar or lemon juice: This adds a refreshing tang and balances the sweetness of the honey.
- Garlic powder or fresh garlic: Adds a savory flavor to balance out the sweet and tangy notes.
- Salt and pepper: Seasoning that brings out the natural flavors.
Here’s a simple recipe for the marinade:
- 1/4 cup honey
- 1/4 cup Dijon mustard
- 2 tablespoons olive oil
- 1 tablespoon apple cider vinegar or lemon juice
- 1/2 teaspoon garlic powder (or 1 minced garlic clove)
- Salt and pepper to taste
Step 2: Mix the Marinade
In a bowl, combine all of the ingredients. Stir or whisk until everything is well mixed. The olive oil will help blend the honey and mustard together, making a smooth marinade.
Step 3: Marinate the Chicken
Place your diced chicken in a plastic bag or shallow dish. Pour the marinade over the chicken, making sure it’s well covered. Seal the bag or cover the dish and refrigerate for at least 30 minutes, or up to 2 hours for more flavor. If you have time, marinate it overnight for the best results!
Step 4: Cook the Chicken
After marinating, let the chicken sit at room temperature for about 10-15 minutes before cooking. This ensures even cooking. Now, cook the chicken:
- Grilling: Preheat your grill to medium-high heat. Grill the chicken for 6-8 minutes per side, or until fully cooked and golden brown.
- Sautéing: Heat some olive oil in a pan over medium-high heat. Cook the chicken for 6-8 minutes, stirring occasionally until it’s cooked through and lightly browned.
- Baking: Preheat the oven to 375°F (190°C). Bake the chicken for 20-25 minutes, or until fully cooked.
- Roasting: Roast the chicken in a preheated oven at 400°F (200°C) for 20-25 minutes, until it’s golden and cooked through.
Step 5: Serve and Enjoy
Once cooked, let the chicken rest for a few minutes. Then, serve it however you like:
- Salads: Add the chicken to a salad for a sweet and tangy twist.
- Wraps or Sandwiches: Use the chicken in wraps or sandwiches for a tasty lunch.
- Rice or Grains: Serve with rice, quinoa, or couscous for a complete meal.
- Roasted Vegetables: Honey mustard chicken pairs well with roasted vegetables like sweet potatoes or carrots.
Pro Tip: Customize Your Marinade
- Spicy version: Add cayenne pepper or chili powder to make it spicy.
- Sweeten it more: For extra sweetness, add more honey or even maple syrup.
- Fresh herbs: Try adding fresh thyme, rosemary, or parsley for extra flavor.
- Creamy marinade: Swap out some olive oil for Greek yogurt for a creamier marinade.
Spicy BBQ Marinade: Bold and Flavorful Kick
A Spicy BBQ marinade is a perfect way to add depth and heat to your diced chicken. Combining the smoky richness of BBQ sauce with a spicy kick, this marinade enhances your chicken with bold flavors that make every bite exciting. Whether you’re grilling, roasting, or sautéing, this marinade brings a smoky, spicy twist to your favorite chicken dishes.
Step 1: Gather Your Ingredients
To make a flavorful spicy BBQ marinade, you’ll need the following ingredients:
- BBQ Sauce: Use your favorite BBQ sauce as the base. It provides the sweet and smoky flavor that makes BBQ marinades special.
- Hot Sauce: Choose a hot sauce that matches your heat preference. Sriracha, Tabasco, or any favorite hot sauce will give the marinade a spicy kick.
- Honey or Brown Sugar: Adds a touch of sweetness to balance out the heat from the hot sauce and the richness of the BBQ sauce.
- Apple cider vinegar or lemon juice: The acidity in vinegar or lemon juice helps balance the richness of the BBQ sauce and adds a refreshing tang to the marinade.
- Garlic powder or minced garlic: Garlic adds savory depth to the marinade, complementing the smoky and spicy flavors.
- Paprika: Paprika enhances the smoky flavor and adds color to the marinade.
- Salt and pepper: These basic seasonings help to enhance the overall flavor.
Here’s a simple recipe for the spicy BBQ marinade:
- 1/4 cup BBQ sauce
- 2 tablespoons hot sauce (adjust to taste)
- 1 tablespoon honey or brown sugar
- 1 tablespoon apple cider vinegar or lemon juice
- 1 teaspoon garlic powder (or 1 clove garlic, minced)
- 1 teaspoon paprika
- Salt and pepper to taste
Step 2: Mix the Marinade
In a mixing bowl, combine all of the ingredients. Stir or whisk the mixture until the BBQ sauce, hot sauce, and honey or sugar are well blended. This will create a smooth, thick marinade that coats the chicken evenly. The hot sauce gives it the heat, while the honey or sugar adds sweetness to balance it out.
Step 3: Marinate the Chicken
Place your diced chicken in a resealable bag or shallow dish. Pour the spicy BBQ marinade over the chicken, ensuring all the pieces are coated. Seal the bag or cover the dish and refrigerate the chicken for at least 30 minutes. For deeper flavor, marinate it for 2 hours or even overnight. The longer it marinates, the more intense the flavor becomes.
Step 4: Cook the Chicken
Once the chicken has marinated, take it out of the fridge and let it come to room temperature for 10-15 minutes. This will help the chicken cook evenly. Now it’s time to cook:
- Grilling: Preheat your grill to medium-high heat. Grill the marinated chicken for 6-8 minutes on each side, or until the chicken is fully cooked and has grill marks.
- Sautéing: Heat a little oil in a skillet over medium-high heat. Add the marinated chicken and sauté for 6-8 minutes, turning occasionally until golden and cooked through.
- Baking: Preheat your oven to 375°F (190°C). Place the marinated chicken on a baking sheet and bake for 20-25 minutes, or until the chicken is fully cooked and tender.
- Roasting: Roast the chicken in a preheated oven at 400°F (200°C) for 20-25 minutes, or until the chicken is golden brown and fully cooked.
Step 5: Serve and Enjoy
Once your chicken is cooked, let it rest for a few minutes before serving. The Spicy BBQ marinade adds a delicious smoky, sweet, and spicy flavor to the chicken. You can serve it with a variety of sides:
- Coleslaw: Pair it with a crunchy coleslaw to balance the heat of the BBQ marinade.
- Grilled Vegetables: The smoky flavors of the chicken work great with grilled or roasted vegetables, like bell peppers, zucchini, or corn.
- Rice or Mashed Potatoes: Serve your chicken with a side of rice, mashed potatoes, or quinoa to complete your meal.
Pro Tip: Customize Your Spicy BBQ Marinade
- Adjust the heat: If you prefer a milder marinade, reduce the amount of hot sauce or use a less spicy variety.
- Add more sweetness: If you like your BBQ a bit sweeter, increase the amount of honey or brown sugar.
- Herb it up: Add fresh or dried herbs, such as thyme or rosemary, to the marinade for extra flavor.
- Smoky twist: For a deeper smoky flavor, add a teaspoon of smoked paprika or liquid smoke to the marinade.
Meal Prep with Diced Chicken for a Week of Easy Meals
Prepping Diced Chicken for the Week: A Simple Guide
Preparing diced chicken for the week is an easy and smart way to save time on cooking. When you have prepped chicken ready to go, you can quickly make a variety of meals without any hassle. Whether you’re making stir-fries, salads, or wraps, having diced chicken on hand makes cooking faster and more convenient.
Step 1: Choose the Right Chicken
The best cuts for diced chicken are boneless, skinless chicken breasts or chicken thighs. Chicken breasts are lean and great for lighter recipes, while thighs are a bit juicier and more flavorful. Trim off any extra fat or skin before dicing.
Step 2: Dice the Chicken
Cut your chicken into small, bite-sized pieces (about 1 inch). For a cleaner cut, place the chicken in the freezer for 15-20 minutes before chopping. This makes the chicken easier to handle.
Step 3: Store the Diced Chicken
Once your chicken is diced, you can store it in a couple of ways:
- In the Fridge: Keep your diced chicken in an airtight container or plastic bag. It will stay fresh for 3-4 days. If you want to absorb extra moisture, add a paper towel at the bottom of the container.
- In the Freezer: If you want to store it longer, freeze the chicken in portions. Use freezer bags, label them with the date, and store them for up to 3 months. Thaw it in the fridge overnight before cooking.
Step 4: Season or Marinate (Optional)
If you want to add flavor right away, season or marinate the chicken before storing. Here are some simple ideas for seasoning:
- Garlic and Herb: A mix of garlic powder, salt, pepper, and dried herbs.
- BBQ: Toss the chicken in your favorite BBQ sauce for a smoky flavor.
- Spicy: Use hot sauce, chili powder, or paprika for a spicy kick.
- Lemon and Olive Oil: A refreshing marinade with lemon juice, olive oil, and garlic.
Step 5: Use Prepped Diced Chicken in Recipes
Now that you have your diced chicken ready, you can use it in a variety of diced chicken recipes:
- Chicken Stir-Fry: Quickly cook the chicken with vegetables and your favorite stir-fry sauce.
- Chicken Salad: Add diced chicken to a salad with your favorite veggies and dressing.
- Chicken Wraps: Fill wraps with diced chicken, fresh veggies, and a delicious sauce for an easy lunch.
- Chicken Bowls: Layer the chicken over rice or quinoa and top with veggies, cheese, or salsa.
- Chicken Soup: Add the chicken directly to soups or stews for added protein.
- Chicken Tacos: Season the chicken with taco seasoning and use it as taco filling.
Step 6: Plan Your Diced Chicken Recipes
To make the most of your prepped diced chicken, plan a few meals for the week. You can prep the chicken in different flavors—BBQ for one dish, taco-seasoned for another, and plain for stir-fries or salads. This way, you have variety without extra work!
Diced Chicken Salad for Lunches: A Healthy and Quick Meal
A diced chicken salad is the perfect solution for a quick, nutritious, and satisfying lunch. Using diced chicken from your meal prep, you can easily throw together a healthy and delicious meal. Diced chicken recipes make great use of prepped chicken, ensuring you always have a protein-packed dish ready in minutes. Whether you’re craving a light and fresh salad or a more filling one, diced chicken recipes work well in many different combinations. It’s not only versatile but also packed with protein, keeping you full and energized throughout the day.
Step 1: Choose Your Base
The foundation of your diced chicken salad starts with a fresh, crunchy base. There are many options, so choose the one that best suits your taste and the diced chicken recipes you want to create:
- Romaine Lettuce: Crisp and refreshing, a great option for a classic chicken salad.
- Spinach: Adds a rich green color and a peppery taste that pairs well with seasoned diced chicken.
- Arugula: A slightly bitter flavor that complements savory diced chicken recipes.
- Mixed Greens: A blend of leafy greens for added texture and variety in your salad.
If you want your salad to be more filling, you can add some grains like quinoa or farro to the base for extra fiber and protein.
Step 2: Add Your Diced Chicken
Now, it’s time for the diced chicken to take the spotlight. You can use diced chicken from your meal prep or cook fresh chicken if you’re making it on the spot. When using prepped chicken, make sure it’s either plain or seasoned to complement the flavors of your salad. The beauty of a diced chicken salad is that you can experiment with different flavors, like BBQ, lemon herb, or even spicy Cajun, for variety in your diced chicken recipes.
For a balanced salad, aim for about 3-4 ounces of diced chicken per serving. This ensures your salad is filling and provides the right amount of protein to keep you energized.
Step 3: Mix in Fresh Veggies
Add some fresh vegetables to your diced chicken salad for extra flavor and crunch. You can customize this part of your salad with whatever veggies you prefer, but here are a few ideas:
- Cucumbers: Light and refreshing, cucumbers add a cool crunch to your diced chicken recipes.
- Cherry Tomatoes: Sweet and juicy, these are a great addition to a diced chicken salad.
- Carrots: Shredded or sliced, carrots bring natural sweetness and color to your salad.
- Bell Peppers: These add a sweet, tangy flavor and bright color to the mix.
- Red Onions: Thinly sliced red onions give your salad a mild kick that pairs well with chicken.
For a truly nutrient-packed salad, mix and match a variety of colorful veggies for added texture and nutrition in your diced chicken recipes.
Step 4: Add Flavorful Toppings
Toppings are what elevate your diced chicken salad to the next level. Here are some great options to add texture and flavor:
- Cheese: Crumbled feta, goat cheese, or shredded cheddar can add richness and creaminess to your diced chicken recipes.
- Nuts and Seeds: Almonds, walnuts, or sunflower seeds provide a satisfying crunch and healthy fats.
- Avocado: Sliced avocado adds creaminess and healthy fats, making your salad more filling.
- Dried Fruits: Raisins, cranberries, or apricots add a touch of sweetness that balances the savory diced chicken.
- Olives: Green or Kalamata olives offer a briny, salty flavor that complements the diced chicken perfectly.
Adding these toppings can transform your salad from simple to gourmet, making your diced chicken recipes even more delicious.
Step 5: Dress It Up
A good dressing is essential to tie all the flavors of your diced chicken salad together. Here are a few dressing options that work beautifully with diced chicken recipes:
- Ranch: Creamy ranch dressing adds a classic, tangy flavor to your chicken salad.
- Balsamic Vinaigrette: The tangy-sweet taste of balsamic vinaigrette balances the richness of the chicken and fresh veggies.
- Lemon and Olive Oil: A light dressing made with lemon juice and olive oil adds a refreshing touch to your salad.
- Caesar Dressing: For an indulgent option, Caesar dressing gives your salad a creamy, savory flavor.
- Honey Mustard: A sweet and tangy option that enhances the flavor of diced chicken in salads.
Remember to add just enough dressing to coat the ingredients lightly—too much dressing can overwhelm the flavors of your diced chicken salad.
Step 6: Toss and Serve
Once you’ve added all your ingredients, toss the salad to mix everything together. Make sure the chicken, veggies, toppings, and dressing are evenly distributed. Taste your salad and adjust the seasoning if needed—add a pinch of salt, a squeeze of lemon, or more pepper for extra flavor.
Meal Prep Tip: Make Ahead for the Week
To make lunchtime even easier, prep your diced chicken salad ingredients in advance. Store the lettuce, veggies, and diced chicken separately in airtight containers, and keep the dressing in a separate container. This way, you can quickly assemble a fresh salad each day without spending much time in the kitchen. By keeping the components separate, you’ll prevent the salad from getting soggy.
Diced Chicken and Veggie Stir-Fry for Dinner: A Quick and Delicious Meal
A diced chicken and veggie stir-fry is a simple and delicious dinner that you can make in under 30 minutes. This meal is perfect for busy nights when you want something healthy, full of protein, and packed with vegetables. Whether you’re using leftover veggies or trying a new diced chicken recipe, this stir-fry is easy to customize and is a great way to use your diced chicken in a quick dinner.
Step 1: Prepare the Chicken
Start by cutting the chicken into small, even pieces. This helps it cook quickly and evenly. You can use chicken breasts or thighs, whichever you prefer. Season the chicken with a little salt, pepper, and any other seasonings you like (garlic powder, ginger, or onion powder work great). If you have time, you can marinate the chicken for 15-30 minutes to make it even more flavorful.
Step 2: Choose Your Veggies
The great thing about stir-fries is how flexible they are! You can use any vegetables you have at home, but here are some great options for a diced chicken stir-fry:
- Bell Peppers: Sweet and crunchy, they add color to the dish.
- Broccoli: Full of vitamins and a great addition to any stir-fry.
- Carrots: Thinly sliced carrots add a sweet crunch.
- Snow Peas: These add a fresh, crisp texture.
- Mushrooms: Sliced mushrooms bring an earthy flavor to the stir-fry.
Feel free to mix and match different veggies to make your stir-fry just the way you like it!
Step 3: Cook the Chicken
Heat a pan or wok over medium-high heat and add a tablespoon of oil. Once the oil is hot, add the diced chicken and cook for 5-7 minutes, stirring often, until it is browned and cooked through. Avoid overcrowding the pan, as this can make the chicken cook unevenly. If needed, you can cook the chicken in batches.
Once the chicken is cooked, remove it from the pan and set it aside for now.
Step 4: Cook the Veggies
In the same pan, add a little more oil and toss in your vegetables. Stir-fry them over medium-high heat for about 3-5 minutes, until they are crisp-tender. Start with the harder vegetables, like carrots and broccoli, and cook them for a minute or two before adding the softer veggies like bell peppers and mushrooms. You want the vegetables to stay crunchy, so don’t overcook them.
Step 5: Make the Stir-Fry Sauce
To make the sauce for your stir-fry, mix together:
- Soy Sauce: This will give the dish a savory, salty flavor.
- Sesame Oil: Adds a bit of a nutty taste.
- Rice Vinegar: Adds a touch of tanginess.
- Honey or Brown Sugar: Adds a little sweetness to balance the saltiness.
- Garlic and Ginger: These fresh ingredients add amazing flavor to your stir-fry.
- Cornstarch: To thicken the sauce and make it glossy.
Pour the sauce over the cooked veggies and stir everything together. If you want some heat, add chili flakes or a little hot sauce.
Step 6: Combine Chicken and Veggies
Add the cooked diced chicken back into the pan with the veggies and sauce. Stir everything to coat the chicken and vegetables with the sauce. Let it cook for another 2-3 minutes so everything is well-mixed and the sauce has thickened slightly.
Step 7: Serve and Enjoy
Once everything is cooked and mixed together, serve your diced chicken and veggie stir-fry hot. You can enjoy it on its own or serve it with steamed rice or noodles to make it a complete meal. For extra flavor, you can drizzle a little soy sauce or hoisin sauce over the top, and garnish with sesame seeds or chopped green onions.
Common Mistakes to Avoid When Dicing Chicken
Cutting Chicken Too Thick or Too Thin: Why Size Matters
When preparing diced chicken recipes, how you cut the chicken is very important. If the pieces are too thick or too thin, it can affect how they cook and how your dish turns out. Let’s look at the issues with cutting chicken the wrong way and how to get it just right.
Why Cutting Chicken Too Thick Is a Problem
Cutting chicken into pieces that are too thick can cause several issues:
- Uneven Cooking: Thick chicken pieces take longer to cook. This means some parts may be undercooked, while others could be overcooked and dry.
- Tough Texture: Thick pieces may not cook through properly, leaving them chewy or tough.
- Less Flavor: Thick chicken won’t absorb marinades or seasonings as well, which can leave some pieces bland.
To avoid this, aim to cut the chicken into pieces that are around 1/2 to 1 inch thick. This ensures even cooking and better flavor.
Why Cutting Chicken Too Thin Is a Problem
Cutting the chicken too thin also has its downsides:
- Dryness: Thin chicken pieces cook very fast, which can cause them to dry out quickly if left in the pan too long.
- Toughness: Very thin pieces of chicken can become rubbery or tough when overcooked.
- Less Flavor: Thin pieces might not hold enough moisture, so they won’t taste as good.
To avoid making your chicken too thin, aim for small, even pieces—just thick enough to keep them tender and juicy.
How to Cut Chicken the Right Way
Follow these tips to cut chicken properly:
- Use a Sharp Knife: A sharp knife makes clean cuts and helps avoid uneven pieces.
- Cut Against the Grain: Always cut the chicken against the grain (the muscle fibers). This keeps it tender and easy to chew.
- Aim for Consistent Size: Cut the chicken into pieces that are roughly the same size. This ensures they cook evenly.
- Flatten with a Mallet (if needed): If some pieces are too thick, you can gently pound them with a meat mallet to make them even.
Ideal Chicken Sizes for Common Recipes
Here’s a guide to the right chicken size for different dishes:
- Stir-Fry: Cut the chicken into pieces about 1/2 to 1 inch thick. This size cooks quickly and stays tender.
- Salads: For a diced chicken salad, cut the chicken into small pieces, about 1/2 inch. This helps mix it easily with other salad ingredients.
- Tacos or Wraps: For chicken tacos, cut the chicken into small, bite-sized pieces, about 1/2 to 3/4 inch.
- Casseroles: For casseroles, larger pieces around 1 inch work well, since they’ll have more time to cook.
Getting the right size and thickness when cutting chicken is key for making tasty diced chicken recipes. Whether you’re preparing a diced chicken stir-fry or a diced chicken salad, cutting the chicken properly ensures it cooks evenly and tastes great.
Not Seasoning the Diced Chicken Properly: Why It Matters
When it comes to diced chicken recipes, seasoning is key to enhancing the flavor of the chicken. Without the right seasoning, even perfectly cooked chicken can taste bland and unappetizing. Here’s a breakdown of why proper seasoning is important and how to make sure your diced chicken is properly seasoned.
The Importance of Seasoning Diced Chicken
Seasoning isn’t just about adding flavor; it’s about balancing the tastes and improving the overall texture of the chicken. Here’s why seasoning is crucial:
- Enhances the Flavor: Proper seasoning brings out the natural flavor of the chicken. Whether you’re making a diced chicken stir-fry or diced chicken salad, the right seasoning adds complexity and richness to the dish.
- Improves Tenderness: Seasonings like salt or acidic ingredients (e.g., lemon juice) can help break down the proteins in the chicken, making it more tender.
- Prevents Blandness: Chicken alone can taste very mild. Seasoning ensures your dish has depth and isn’t bland.
Common Mistakes When Seasoning Diced Chicken
Many cooks make mistakes when seasoning chicken. Here are some common errors to avoid:
- Not Seasoning Early Enough: Season the chicken before cooking to allow the flavors to soak in. If you wait until after it’s cooked, the seasonings only flavor the outside, not the meat inside.
- Over-Seasoning: It’s easy to go overboard with salt or spices, which can overwhelm the dish. Start with a small amount, then adjust to taste.
- Under-Seasoning: On the other hand, not using enough seasoning can result in bland chicken. Be sure to taste the chicken as you cook and adjust the seasoning as needed.
- Sticking to Salt and Pepper: While salt and pepper are essential, adding garlic powder, onion powder, herbs, and spices can elevate the flavor. Try different combinations depending on your recipe.
How to Properly Season Diced Chicken
Follow these steps for the best seasoning results:
- Use a Good Base: Salt and pepper are the foundation of any seasoning. Don’t skip these!
- Add Complementary Spices: Depending on the recipe, add spices like garlic powder, paprika, or cumin for extra flavor.
- Consider Marinating: Marinating the chicken allows the flavors to infuse deeply. Use a combination of acid (e.g., lemon juice), fat (e.g., olive oil), and spices for the perfect marinade.
Proper seasoning can make a huge difference in the flavor of your diced chicken recipes. Take the time to season your chicken well, and you’ll be rewarded with a flavorful dish every time.
Overcooking Diced Chicken: Why Timing is Crucial
Overcooking diced chicken is one of the most common mistakes people make in the kitchen. It’s easy to overlook, but the consequences are significant: dry, tough, and flavorless chicken that no one wants to eat. Knowing how to cook diced chicken to perfection requires a solid understanding of timing and technique.
What Happens When You Overcook Diced Chicken?
Overcooking occurs when chicken is exposed to heat for too long. When this happens, the chicken becomes dry, rubbery, and hard to chew. The reason for this is simple: heat causes the proteins in the chicken to contract, squeezing out moisture, which results in a dry, tough texture. The longer the chicken cooks, the more moisture is lost, leading to a dry, unappetizing dish.
Here’s what happens when diced chicken is overcooked:
- Dryness: Overcooked chicken is devoid of moisture, making it unpleasant to eat.
- Toughness: Overcooked meat becomes stringy and chewy, which can make it hard to swallow.
- Loss of Flavor: Overcooking destroys the delicate flavors of chicken, leaving it bland.
Understanding these effects can help you avoid them in your diced chicken recipes and achieve perfectly cooked chicken every time.
How Long Should You Cook Diced Chicken?
Cooking time is critical when working with diced chicken. Because chicken pieces are small, they cook much faster than whole cuts, so it’s easy to go from perfectly cooked to overcooked in a matter of minutes. Here’s a guideline:
- Small Diced Pieces (1/2-inch cubes): These pieces typically take 5-7 minutes to cook through.
- Medium Diced Pieces (1-inch cubes): These pieces may take 7-9 minutes, depending on the heat.
The key is to watch for color change and check the internal temperature. Chicken should no longer be pink, and its internal temperature should reach 165°F (75°C) to ensure it’s safe to eat. Be mindful of the cooking time to avoid overcooking.
How to Avoid Overcooking Diced Chicken
Here are several tips to help prevent overcooking diced chicken:
- Cook on Medium Heat Cooking over high heat can cause the outside of the chicken to burn while the inside remains raw. Instead, cook the chicken over medium heat for even cooking.
- Use a Timer Diced chicken cooks quickly, so it’s easy to forget about it. Use a timer to keep track of cooking time and ensure you don’t leave the chicken on the heat for too long.
- Check the Internal Temperature A meat thermometer is a useful tool to check the internal temperature of the chicken. The chicken is safe and perfectly cooked once it reaches 165°F (75°C). This ensures that the chicken is both fully cooked and not overdone.
- Avoid Overcrowding the Pan When you overcrowd the pan with chicken pieces, the chicken will steam rather than sear, which can lead to uneven cooking. Make sure to cook the chicken in batches if needed.
Signs of Overcooked Diced Chicken
If you’ve accidentally overcooked your diced chicken, it may show some of these telltale signs:
- Dry Texture: The chicken is no longer moist and feels dry when you bite into it.
- Toughness: The chicken becomes chewy, and it might be difficult to cut or shred.
- Lack of Juices: The chicken doesn’t release any juices when you cut it, indicating that it’s dried out.
If you notice any of these signs, it’s an indication that the chicken has been overcooked.
How to Fix Overcooked Diced Chicken
While overcooked chicken is hard to salvage completely, there are a few ways to improve its texture:
- Add Sauce or Liquid: Adding a flavorful sauce or broth can help rehydrate the chicken and restore some moisture.
- Shred the Chicken: Overcooked diced chicken can be shredded and used in recipes like tacos, soups, or salads, where the texture isn’t as noticeable.
- Mix with Moist Ingredients: Adding the chicken to a dish that includes moist ingredients, like rice or vegetables, can help make it more palatable.
By following these tips and being mindful of your timing, you can avoid the pitfalls of overcooking and ensure your diced chicken recipes turn out perfectly every time.
Looking for more chicken recipes? Check out our 5 Chicken Salad Chick Recipe Variations You Need To Try for fresh ideas
Conclusion: Mastering Diced Chicken Recipes
Mastering the art of cooking with diced chicken opens up a world of culinary possibilities. Whether you’re preparing a quick diced chicken stir-fry, a delicious chicken salad, or a comforting diced chicken and rice bowl, understanding how to handle, cook, and season diced chicken is key to creating flavorful, tender dishes every time. As a result, with the right techniques, you can elevate even the simplest of meals.
Furthermore, by following the tips and techniques shared in this guide, you’ll be able to avoid common mistakes like overcooking, improper seasoning, or choosing the wrong cut of chicken. In addition, the versatility of diced chicken allows you to experiment with various marinades and flavors, giving you endless opportunities to customize your dishes. Therefore, don’t hesitate to explore and add your own twists to these recipes!
Moreover, we encourage you to try different flavor profiles. Whether you prefer spicy BBQ, garlic and lemon marinades, or a simple honey mustard glaze, each variation can add a unique touch to your meals. In conclusion, the possibilities are truly endless, and with a little practice, you’ll find yourself creating diced chicken recipes that are sure to impress your friends and family.
Finally, we’d love to hear from you! As a bonus, share your favorite diced chicken dishes in the comments below, and feel free to let us know how you make your chicken meals even more delicious. So, happy cooking, and don’t forget to experiment with new ingredients and flavors