
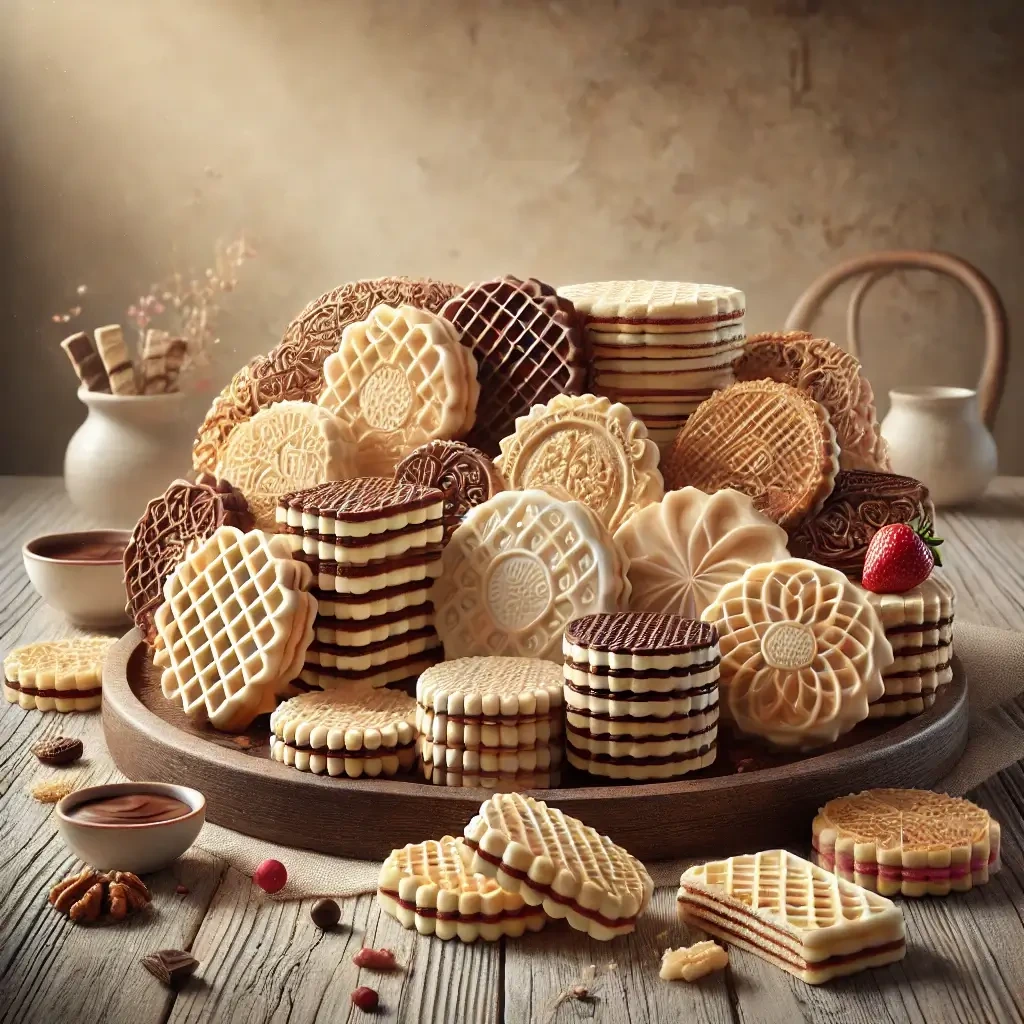
Wafer cookies are a delightful treat, known for their light and crispy texture. Whether you enjoy them as a snack or use them in various desserts, these cookies are the perfect sweet addition to any occasion
Best Wafer Cookie Recipes
Crispy Texture That Delights the Senses
Wafer cookies are renowned for their light, crispy texture. The thin, delicate layers of the wafer provide a satisfying crunch with every bite. This crispness contrasts beautifully with the smooth fillings, creating a balanced and enjoyable eating experience. Whether you enjoy a single wafer or a stack, the crunch remains consistent, making them an irresistible treat.
Endless Flavor Combinations
Crispy wafer cookies: makes wafer cookies even more exciting is their versatility in flavor. The neutral taste of the wafer layer provides the perfect base for a wide range of fillings. Traditional options like chocolate, vanilla, and hazelnut never disappoint, but modern variations expand the possibilities even further.
You can find wafer cookies filled with fruity flavors such as strawberry, lemon, or raspberry. For a more exotic twist, flavors like matcha, coconut, or even salted caramel have become popular choices. Each filling complements the crispy texture of the wafer, elevating the flavor profile and adding a layer of indulgence.
Flavors and Toppings to Match Every Mood
Crispy wafer cookies : The versatility of wafer cookies doesn’t stop at the filling. Many recipes incorporate coatings or toppings that add another dimension to the flavor. You’ll often find wafer cookies dipped in rich chocolate, drizzled with caramel, or sprinkled with crushed nuts for extra crunch. Some may even have a light dusting of powdered sugar or a touch of honey for added sweetness.
This adaptability allows you to customize your wafer cookies to suit any occasion or preference. From classic chocolate to more adventurous combinations, the possibilities are endless. Whether you prefer sweet, savory, or a combination of both, wafer cookies offer a canvas for creativity.
Why Wafer Cookies Are a Crowd Favorite
Crispy wafer cookies, combined with endless flavor options, makes wafer cookies perfect for all types of gatherings. They pair wonderfully with coffee, fit seamlessly into layered desserts, and serve as a crowd-pleasing snack at parties. Their adaptability allows you to tailor them to various tastes, ensuring everyone can enjoy a bite of something special.
Perfect for Baking and Desserts
Crispy wafer cookies, are an excellent ingredient for both baked goods and no-bake desserts. Their unique, light, and crispy texture provides a satisfying crunch that complements creamy, soft fillings. This contrast in textures enhances the overall experience of any dessert. Whether you’re baking a cake or preparing a chilled dessert, wafer cookies hold their form beautifully and do not become soggy.
Endless Possibilities in Desserts
Crispy wafer cookies are incredibly versatile and can be used in countless dessert recipes. Crushed wafer cookies make an excellent base for cheesecakes, tarts, or pies, providing a flavorful and crunchy foundation. If you’re making layered desserts like trifles or parfaits, wafer cookies offer the perfect structural support, adding layers of texture. Their crisp nature pairs well with various fillings, from fruit to chocolate mousse, enhancing both flavor and presentation.
Ideal for Ice Cream and Frozen Treats
One of the best uses for Crispy wafer cookies is in frozen desserts, like ice cream sandwiches or frozen cakes. When layered with ice cream or whipped cream, wafer cookies maintain their crispness, adding a delightful crunch with every bite. This makes them the perfect ingredient for hot days or casual gatherings, where the combination of cold and crunchy can elevate any dessert. You can even dip the cookies in chocolate or other toppings for extra flavor and elegance.
Absorbing Flavors Without Losing Texture
Crispy wafer cookies are particularly great at absorbing flavors while retaining their signature crisp texture. This makes them an ideal choice for soaking up the flavors of creamy fillings, syrups, or chocolate. Whether you’re using them in a classic icebox Crispy wafer cookies or as a crunchy layer in mousse cups, they add not only texture but also a touch of sweetness that enhances the other ingredients. The wafer cookie’s ability to absorb and balance different flavors helps elevate any dessert they are part of. Example: “For more dessert inspiration, check out this amazing recipe collection!
Top 10 Wafer Cookie Recipes You Have to Try
Chocolate-Dipped Wafer Cookies
When it comes to classic wafer cookies, the vanilla flavor stands out. These wafer cookies are light, crispy, and ideal for filling with a variety of tasty fillings, from chocolate to cream. You can also coat your wafer cookies with a dusting of powdered sugar or dip them in chocolate for added flavor
Why Classic Vanilla Wafer Cookies Are a Favorite
One reason these cookies are so beloved is because of their versatility. Classic vanilla wafer cookies can be enjoyed on their own, served with a cup of tea or milk, or incorporated into other delicious desserts. Their delicate flavor pairs well with many ingredients, making them an easy choice for everything from a quick snack to a sophisticated dessert. They are often used as the base for layered desserts like trifles, ice cream cakes, and parfaits.
The Perfect Texture: Crisp and Light
These Crispy wafer cookies are known for their crispy yet light texture, which makes them irresistible. The balance between crunch and tenderness gives them an appeal that other cookies may lack. Their structure is ideal for both standalone treats and for incorporating into other recipes, such as pie crusts or cheesecake bases.
Enhancing Flavor with Quality Ingredients
When making classic vanilla wafer cookies at home, the key to achieving a rich flavor is using high-quality ingredients. Pure vanilla extract, fresh butter, and good quality flour will make a noticeable difference in taste. Adding a pinch of salt can also enhance the sweetness and provide a better overall flavor. For those who enjoy experimentation, try adding different flavorings like almond or lemon zest for a creative twist.
Creative Ways to Use Classic Vanilla Wafer Cookies
While these cookies are delightful on their own, there are numerous creative ways to use them. Crushed wafer cookies make a fantastic crust for pies, cheesecakes, and tarts. They can also be dipped in chocolate, caramel, or other coatings for an extra indulgent treat. Their lightness makes them a perfect addition to layered desserts like trifles, where they provide texture without overwhelming other flavors.
Chocolate-Dipped Wafer Cookies: A Decadent Twist on a Classic Favorite
Chocolate-dipped wafer cookies are a delightful and indulgent variation of the traditional vanilla wafer cookie. The smooth, rich chocolate coating adds a layer of luxury and sweetness, elevating the flavor profile and creating a satisfying contrast with the crisp, light texture of the wafer. This treat is perfect for those who enjoy the combination of crispy and creamy textures, as the chocolate creates a velvety contrast against the crunchy wafer base.
The Allure of Chocolate and Wafer Combination
The marriage of chocolate and wafer cookies is nothing new, but it never fails to impress. The crispy, delicate wafer acts as the perfect vehicle for holding onto the rich chocolate, ensuring each bite delivers a balanced combination of both. Whether you choose dark, milk, or white chocolate, each variation offers its own unique flavor, allowing for personalization and versatility.
How to Create the Perfect Chocolate-Dipped Wafer Cookies
Creating your own chocolate-dipped wafer cookies at home is simple and rewarding. Start by selecting your preferred wafer cookies—store-bought or homemade—then choose your chocolate. High-quality chocolate is key to achieving that smooth, glossy finish and rich flavor. Melt the chocolate gently using a double boiler or microwave, stirring until completely smooth. Dip each wafer cookie halfway into the chocolate, ensuring it’s evenly coated, then place the cookies on parchment paper to set.
Customizing Your Chocolate-Dipped Wafer Cookies
For added flair, you can drizzle additional chocolate over the top or sprinkle with toppings such as crushed nuts, sprinkles, or sea salt. The chocolate will harden as it cools, leaving you with a decadent treat that’s perfect for sharing or enjoying on your own.
Serving Suggestions and Variations
Chocolate-dipped wafer cookies make an excellent treat for various occasions. They can be served as part of a dessert spread, offered as a gift in decorative boxes, or enjoyed as an everyday snack. To elevate the experience, consider pairing these cookies with a rich cup of coffee or hot chocolate, making them an even more indulgent treat. For a fun twist, try using flavored chocolates, such as hazelnut or mint, to create new and exciting flavor combinations.
Why You’ll Love Chocolate-Dipped Wafer Cookies
The beauty of chocolate-dipped wafer cookies lies in their simplicity and versatility. They are easy to make, yet offer a sophisticated and indulgent flavor that appeals to all ages. Whether you’re hosting a party, looking for a gift idea, or just treating yourself, these cookies are guaranteed to impress. The combination of crunchy, crispy wafers with creamy, rich chocolate is a timeless pairing that’s always a crowd-pleaser.
These cookies are also great for customizing to suit various dietary preferences or needs. For example, you could use dairy-free chocolate to create a vegan-friendly treat or opt for gluten-free wafers to accommodate gluten sensitivities. The endless possibilities ensure that everyone can enjoy the deliciousness of chocolate-dipped wafer cookies.
Wafer Cookies with Nutella Filling: A Delectable Fusion of Crunch and Creaminess
Crispy wafer cookies are not just a sweet snack; they offer endless possibilities when combined with other delicious ingredients. One of the best combinations is crispy wafer cookies with Nutella filling. This dessert brings together the airy, crunchy texture of the wafer cookies with the smooth, indulgent richness of Nutella, creating a delightful treat that’s hard to resist. Whether you’re looking for a quick dessert or something to impress guests, these wafer cookie sandwiches are the perfect solution.
Why Choose Crispy Wafer Cookies for This Recipe?
Crispy wafer cookies are light, crunchy, and versatile, making them the ideal base for a variety of fillings. They allow the Nutella filling to shine while offering a satisfying crunch. The balance of textures in these crispy wafer cookies—light and airy yet sturdy enough to hold a rich filling—creates a perfect bite every time. Not only do they provide a delicious crunch, but crispy wafer cookies are also easy to find in stores or make at home. Using high-quality wafer cookies ensures that your treat will have the best texture and flavor.
How to Make Crispy Wafer Cookies with Nutella Filling
To make crispy wafer cookies with Nutella filling, you’ll need just a few basic ingredients. Start with crispy wafer cookies, either store-bought or homemade. Spread a generous layer of Nutella on one wafer and gently sandwich it with another wafer. This simple method is not only quick but ensures the perfect balance of crispy texture and creamy Nutella in each bite.
If you want to elevate your crispy wafer cookies with Nutella filling, you can experiment with toppings. Drizzle melted chocolate over the top for a decadent finish or add chopped nuts to enhance the crunch. A sprinkle of powdered sugar adds an elegant touch and makes these treats perfect for parties or special occasions.
Why Nutella Filling Works So Well with Crispy Wafer Cookies
Nutella filling complements crispy wafer cookies in more ways than one. The rich, velvety texture of Nutella contrasts beautifully with the light, crispy texture of the wafer. When you take a bite, you get an immediate contrast of textures—crunchy, creamy, and slightly nutty—which makes each mouthful irresistible. Nutella also pairs well with various other flavors, so you can add different fillings such as hazelnut or fruit jams if you like, giving you the freedom to get creative with your recipes.
Serving and Enjoying Crispy Wafer Cookies with Nutella Filling
These crispy wafer cookies with Nutella filling are perfect for any occasion. They’re quick and easy to make, which makes them an excellent choice for last-minute dessert ideas. Serve them at birthday parties, holiday gatherings, or even as an afternoon treat with a hot cup of coffee. You can also store them in an airtight container to keep them fresh, so you’ll have a delicious treat ready whenever the craving strikes.
Wafer Cookies with Pastry Cream: A Luxurious Take on a Classic Treat
Wafer cookies filled with pastry cream elevate the traditional treat into a dessert worthy of special occasions. The delicate, crispy texture of the wafer pairs perfectly with the rich, silky smoothness of the pastry cream, creating a delightful contrast that’s both satisfying and indulgent. This combination brings a touch of elegance to a humble cookie, making it an irresistible option for anyone with a sweet tooth.
Why Pastry Cream is the Ideal Filling
Pastry cream, a staple in many classic desserts, is made from simple yet luxurious ingredients like milk, eggs, sugar, and vanilla. Its creamy consistency adds a layer of sophistication to the lightness of wafer cookies. Moreover, pastry cream can be easily flavored with various additions, such as chocolate, coffee, or fruit purees, allowing endless customization. This versatility makes it an excellent choice for transforming plain wafers into gourmet delights.
How to Prepare Wafer Cookies with Pastry Cream
- Prepare the Pastry Cream: Start by whisking together egg yolks and sugar until pale and creamy. Gradually add milk and heat the mixture over medium heat, stirring constantly, until it thickens into a smooth cream. Stir in vanilla extract or other desired flavors and let it cool completely.
- Layer the Cookies: Spread a generous layer of the cooled pastry cream onto one wafer sheet. Place another sheet on top and press lightly to create an even layer.
- Set and Chill: Refrigerate the layered wafers for at least 30 minutes to allow the cream to set, making the cookies easier to handle and enhancing the flavors.
- Cut and Serve: Slice the layered wafers into bite-sized squares or rectangles. You can serve them as is or add decorative touches for a polished look.
Creative Variations to Try
- Fruit-Infused Pastry Cream: Incorporate fruit purees like strawberry, raspberry, or mango into the pastry cream for a refreshing twist.
- Chocolate Pastry Cream: Blend melted chocolate into the cream for a decadent flavor that pairs beautifully with the crisp wafers.
- Coffee-Flavored Cream: Add a teaspoon of espresso powder to the cream for a sophisticated, coffee-infused treat.
Tips for Perfect Results
- Use High-Quality Ingredients: The flavor of the pastry cream shines best when you use fresh milk, high-quality vanilla, and good-quality wafers.
- Adjust Sweetness: Depending on the sweetness of the wafers, you may want to reduce the sugar in the pastry cream for a balanced flavor.
- Decorate for Impact: Dust the finished cookies with powdered sugar or drizzle them with melted chocolate for a professional touch.
Perfect for Entertaining
Wafer cookies with pastry cream are an excellent choice for entertaining. They’re easy to prepare ahead of time, and their elegant appearance makes them a standout addition to any dessert table. Whether served with coffee at a brunch or as part of an elaborate dinner party spread, these cookies are sure to impress guests with their sophisticated flavor and texture.
How to Make Homemade Wafer Cookies

Essential Ingredients for Perfect Wafer Cookies: The Foundation of a Delicious Treat
Creating the perfect wafer cookies starts with using the right ingredients. These simple yet essential elements are what contribute to the delicate, crispy texture and delightful taste that wafer cookies are known for. Whether you’re making classic wafers or experimenting with different fillings and toppings, understanding the role of each ingredient is crucial to achieving that perfect crunch and flavor balance.
1. Flour: The Base for Structure
Flour serves as the foundation of your wafer dough, providing the structure needed for the cookies to hold together while still being light and crisp. While all-purpose flour is commonly used, some recipes may call for a mixture of all-purpose and cake flour to enhance the lightness. The right flour ratio ensures that the wafer cookies have the perfect texture without being too dense or chewy.
- Tip: For a gluten-free version, you can substitute with rice flour or a blend of gluten-free flours, but it may alter the texture slightly.
2. Butter: Adding Richness and Crispness
Butter is essential for providing the signature richness and crisp texture of wafer cookies. The fat content in butter helps to create a delicate crumb that shatters delightfully when bitten into. Butter also adds flavor, making the cookies more indulgent.
- Tip: Use unsalted butter for better control over the seasoning of the dough. The richness of European-style butter can elevate the flavor profile if you want a more decadent treat.
3. Sugar: Balancing Sweetness and Texture
Sugar not only sweetens the dough but also contributes to the crisp texture of wafer cookies. As the dough bakes, sugar helps create a golden-brown crust that adds both flavor and visual appeal. Different types of sugar—such as granulated, powdered, or brown sugar—can be used depending on the desired outcome.
- Tip: Brown sugar can add a hint of molasses flavor, while powdered sugar can yield a smoother dough that’s easier to roll.
4. Eggs: Binding and Moisture
Eggs serve as a binder in the dough, helping to hold the ingredients together and ensuring that the wafer cookies don’t crumble. They also contribute to the light, airy texture that’s characteristic of wafer cookies. The proteins in eggs help firm up the dough as it bakes, creating a perfect crispy exterior while maintaining a tender bite.
- Tip: Be sure to use room temperature eggs to ensure even mixing and prevent any temperature shock when incorporating them into the dough.
5. Vanilla Extract: Flavor Enhancement
Vanilla extract adds a subtle, warm sweetness that complements the other ingredients in the wafer cookies. While it’s not always the dominant flavor, it enhances the overall profile, creating a more well-rounded, comforting taste.
- Tip: Choose high-quality vanilla extract for the best results. Avoid imitation vanilla, as it can result in a less natural flavor.
6. Salt: Bringing Balance to the Sweetness
A small pinch of salt is essential for balancing the sweetness of the dough and enhancing the overall flavors. Salt acts as a flavor amplifier, helping to highlight the vanilla and butter while providing contrast to the sugary notes.
- Tip: Don’t skip the salt, even if the recipe seems to be predominantly sweet. It helps create a more sophisticated, rounded flavor.
7. Cornstarch (Optional): For Extra Crispiness
While not always necessary, cornstarch can be added to the dough to enhance the crispiness of the wafers. This ingredient helps create a lighter, more delicate texture by softening the gluten in the flour, resulting in a thinner, crispier cookie.
- Tip: If you prefer an extra-crisp wafer, add a small amount (usually about 1-2 tablespoons) of cornstarch to your flour mixture.
Step-by-Step Instructions for Making Wafer Cookies: A Simple Guide to Perfection
Making wafer cookies is a delightful and relatively simple process that doesn’t require complex techniques or fancy equipment. The key to making perfect wafer cookies lies in understanding each step and following them closely. Below is a step-by-step guide to help you make delicious, crispy, and melt-in-your-mouth wafer cookies every time.
Step 1: Prepare Your Ingredients
Before starting, gather all of your ingredients. Having everything ready to go ensures that you won’t be scrambling during the process. Measure out your flour, sugar, eggs, butter, and any additional flavorings like vanilla extract or salt. If you’re using cornstarch for extra crispness, measure that out as well.
- Tip: Make sure all ingredients, especially the butter and eggs, are at room temperature. This ensures they mix evenly and contribute to a smooth dough.
Step 2: Cream the Butter and Sugar
In a large mixing bowl, combine your softened butter and sugar. Use an electric mixer or stand mixer on medium speed to cream them together until the mixture is light and fluffy. This process is crucial for the texture of the wafer cookies, as it helps incorporate air into the dough, giving it a lighter, crispier texture.
- Tip: Cream the butter and sugar for about 3-5 minutes until the mixture becomes pale and fluffy. This step is essential for achieving a delicate and airy cookie texture.
Step 3: Add Eggs and Vanilla
Once your butter and sugar are creamed, add the eggs one at a time, beating well after each addition. After the eggs are incorporated, add in the vanilla extract and mix until the batter becomes smooth. The eggs serve as the binder for the dough and provide structure, while the vanilla adds flavor.
- Tip: Be sure to add eggs one at a time to prevent the mixture from curdling. This ensures a smooth, homogenous batter.
Step 4: Mix in Dry Ingredients
In a separate bowl, sift together your flour, salt, and cornstarch (if using). Gradually add the dry ingredients into the wet mixture, mixing on low speed. Once the flour mixture is incorporated, you’ll have a soft dough. Be careful not to overmix, as this can make the cookies tough.
- Tip: Sifting the dry ingredients helps to avoid any lumps and ensures that the flour is evenly distributed throughout the dough.
Step 5: Roll and Shape the Dough
Once your dough is ready, turn it out onto a lightly floured surface. Divide the dough into smaller portions to make it easier to work with. Roll each portion out as thinly as possible—wafer cookies should be incredibly thin to achieve their signature crisp texture.
- Tip: Use a rolling pin with even pressure to keep the dough uniform in thickness. You can use a ruler to check the thickness if needed, aiming for about 1/8 inch (3mm) thickness.
Step 6: Cut the Dough into Shapes
After rolling out the dough, use a cookie cutter or a sharp knife to cut the dough into your desired shapes. The traditional shape for wafer cookies is rectangular, but you can also opt for circles or other fun shapes depending on the occasion.
- Tip: If you’re making wafer cookies with a filling, cut them slightly larger to accommodate the cream or Nutella filling between the layers.
Step 7: Bake the Wafer Cookies
Preheat your oven to 350°F (175°C). Place the cookie shapes on a baking sheet lined with parchment paper, ensuring they are spaced at least an inch apart. Bake the cookies for 8-10 minutes or until they are golden brown. The exact baking time will vary depending on the thickness of your cookies, so keep an eye on them toward the end to prevent burning.
- Tip: For crispier wafer cookies, leave them in the oven for an additional 1-2 minutes, but be careful not to overbake them. The cookies should be golden and firm, not dark brown.
Step 8: Cool the Cookies
Once your wafer cookies are baked, remove them from the oven and allow them to cool on the baking sheet for a few minutes. After that, transfer the cookies to a wire rack to cool completely. This is important as the cookies will become crispier as they cool.
- Tip: Be patient during the cooling process. If you try to handle the cookies while they’re still warm, they may break easily. Let them cool fully to achieve the perfect crisp texture.
Step 9: Assemble and Add Fillings (Optional)
While the wafer cookies are cooling, you can prepare any fillings or toppings you plan to use. If you want to create a layered wafer cookie, spread your filling, such as Nutella, pastry cream, or whipped cream, between two cookies once they’ve cooled. You can also drizzle melted chocolate over the top or dip one end of each cookie in chocolate for added flavor.
- Tip: When adding filling, be sure not to overstuff the cookies, as it may cause them to break or become too soft. A thin layer of filling works best.
Step 10: Serve and Enjoy
Once your wafer cookies are fully assembled and filled (if desired), they are ready to serve! Whether you’re serving them at a special event or enjoying them as an everyday snack, wafer cookies are a treat that everyone will love.
- Tip: Store the wafer cookies in an airtight container to keep them fresh for longer. They should last for about a week.
Tips for Perfecting the Wafer Texture: Achieving the Ultimate Crispness and Delicacy
Wafer cookies are loved for their light, crisp texture that easily melts in your mouth. Achieving this perfect wafer texture can be tricky, but with the right techniques and tips, you can create cookies with that signature crunch and delicate crispness every time. Here are some helpful tips to ensure your wafer cookies have the perfect texture:
1. Use Cold Ingredients for Dough
While most cookies benefit from softened ingredients, wafer cookies require cold ingredients to achieve their crisp texture. This includes butter, eggs, and any liquids you use. The reason for this is that cold butter helps create a dough that holds together better, preventing it from spreading too much while baking. Chilled dough also results in thinner cookies that bake evenly and maintain their delicate crunch.
- Tip: Chill your dough for at least 30 minutes before rolling it out. This gives the dough time to firm up and ensures that it’s easier to roll thin, preventing the cookies from becoming too soft during baking.
2. Roll the Dough Thinly
The key to a crispy wafer is rolling the dough as thin as possible without making it so thin that it becomes fragile or cracks. A thinner dough will bake into a crisp, delicate wafer, while thicker dough may result in cookies that are too soft or doughy.
- Tip: Roll the dough between two sheets of parchment paper to avoid sticking and to control the thickness. Aim for a thickness of about 1/8 inch (3mm). If the dough is rolled too thick, the cookies won’t have that light, crunchy texture that defines a perfect wafer.
3. Bake at a Moderate Temperature
Baking wafer cookies at a moderate temperature—typically around 350°F (175°C)—is crucial for achieving that crispy texture without burning the edges. If the temperature is too high, the cookies will brown too quickly, resulting in an overly crispy, burnt texture. If it’s too low, they may become too soft and fail to crisp up as desired.
- Tip: Preheat your oven thoroughly before baking. Place the cookies on the middle rack to ensure even heat distribution. Bake in batches if necessary, as overcrowding can lead to uneven baking.
4. Use Cornstarch for Extra Crispness
Cornstarch is a secret ingredient used in many wafer recipes to enhance the crisp texture. It helps lighten the dough, which results in a more delicate and crunchy wafer. When combined with the flour, it produces a crispier texture, and the cookies maintain their snap long after baking.
- Tip: Add 1-2 tablespoons of cornstarch to your dough mixture for every cup of flour. This will help improve the wafer’s crispness without affecting the flavor.
5. Don’t Overmix the Dough
Wafer dough needs to be mixed just enough to incorporate all ingredients. Overmixing can lead to a denser, chewier texture, which is the opposite of what you want for wafer cookies. Overworking the dough can also activate the gluten in the flour, resulting in a tough cookie instead of a delicate one.
- Tip: Mix the dough until just combined, then stop. If you notice lumps or uneven flour spots, gently fold the dough with a spatula until it becomes smooth. Avoid using the mixer for too long.
6. Allow Cookies to Cool Completely on a Rack
After baking, it’s important to let the wafer cookies cool completely on a wire rack before storing or handling them. The cooling process allows the cookies to firm up, and as they cool, they become crispier. If you handle the cookies while they are still warm, they may bend or break easily.
- Tip: Let the cookies cool on a wire rack for at least 10 minutes before moving them. If you’re making a large batch, rotate them on the rack occasionally to ensure even cooling.
7. Store in an Airtight Container
To maintain the crisp texture of your wafer cookies, store them in an airtight container once they’ve cooled completely. Exposure to moisture in the air can cause the cookies to soften, so sealing them in a container will help keep them fresh and crispy. You can also add a packet of silica gel or a piece of bread to absorb any moisture inside the container.
- Tip: If you’re making wafer cookies in advance, freeze the dough (not the baked cookies) and bake it later. This ensures that the cookies are as fresh and crisp as possible when you serve them.
8. Bake for a Little Longer for Extra Crispness
If you want your wafer cookies to be extra crispy, allow them to bake for a little longer than the recipe suggests. Be careful not to overdo it, as burning the cookies will ruin their delicate texture. Just a minute or two extra will help achieve that perfect golden-brown crispness.
- Tip: Keep an eye on the cookies towards the end of baking, checking for a light golden color. The cookies will continue to crisp up slightly as they cool, so be cautious not to overbake them.
9. Use Parchment Paper or Silicone Mats
Using parchment paper or silicone baking mats ensures that your wafer cookies don’t stick to the baking sheet, which can affect their crispiness. These liners also promote even baking, preventing hot spots that could cause uneven cooking and texture.
- Tip: If you’re using parchment paper, make sure it’s non-stick and fits well on your baking sheet to ensure easy removal. If you’re using a silicone mat, no greasing is necessary, and it helps with even heat distribution.
Chocolate Wafer Cookies with Hazelnut Filling: A Decadent Combination of Crunch and Cream
1. The Perfect Balance of Chocolate and Hazelnut
One of the key elements that make these cookies so special is the balance between the chocolate and hazelnut flavors. Chocolate pairs beautifully with hazelnuts, bringing out the nutty richness in both the nuts and the cookie itself. Whether you use a milk, dark, or semi-sweet chocolate for the coating, the chocolate provides a perfect counterpoint to the creamy hazelnut filling, creating a symphony of flavors that feel both luxurious and comforting.
- Tip: For an extra indulgent treat, use high-quality chocolate that contains a higher percentage of cocoa. This will provide a richer chocolate flavor that complements the sweetness of the hazelnut filling.
2. The Crunchy, Crisp Texture of the Wafer
The wafer cookies themselves are what provide the essential crunch in this combination. Light and crispy, they allow the richness of the chocolate and hazelnut filling to stand out. Unlike other cookies that might be chewy or dense, wafer cookies provide a light and airy bite, making them the perfect vessel for holding the filling without becoming soggy or weighed down. This texture contrast is essential for keeping the cookie delicate yet satisfying.
- Tip: Make sure to bake the wafer cookies thinly and evenly, as an overly thick wafer might affect the texture, making it less crisp and delicate.
3. The Hazelnut Filling: A Creamy, Nutty Delight
The hazelnut filling is the star of these cookies. When made with a blend of roasted hazelnuts, butter, sugar, and a bit of cream or milk, the filling takes on a smooth, rich consistency that melts in your mouth. Hazelnut paste or Nutella can be used for convenience, but making your own filling from scratch offers the opportunity to control the flavor intensity and texture. A homemade hazelnut filling is nutty, slightly sweet, and creamy, enhancing the overall flavor experience of the wafer cookie.
- Tip: To make your hazelnut filling at home, blend roasted hazelnuts with sugar and cream until smooth. Add a small amount of butter to achieve the right creamy consistency. If you prefer a stronger nut flavor, increase the amount of roasted hazelnuts.
4. Layering the Filling for Maximum Flavor
When assembling chocolate wafer cookies with hazelnut filling, it’s important to apply the filling evenly between each layer of wafer cookies. The filling should be spread generously, but not too thickly, as this could cause the cookies to become too soft or difficult to manage. A thin layer allows the hazelnut flavor to infuse the cookie without overpowering the other elements.
- Tip: Use a piping bag or an offset spatula to spread a smooth, even layer of hazelnut filling onto each wafer. Be mindful of the edges to ensure that the filling doesn’t spill out when the cookies are assembled.
5. Chocolate Coating: For an Extra Touch of Decadence
While the wafer cookies are delicious on their own, dipping or drizzling them with chocolate takes them to another level of indulgence. A simple chocolate coating adds an extra layer of flavor and enhances the visual appeal of the cookies. Whether you coat the entire wafer in chocolate or just drizzle a decorative pattern on top, this chocolate layer ties everything together beautifully.
- Tip: For a glossy, professional-looking finish, temper the chocolate before coating the cookies. This ensures that the chocolate hardens correctly and has a smooth, shiny finish. You can also experiment with different types of chocolate—milk chocolate for sweetness or dark chocolate for a more intense flavor.
6. A Versatile Treat for Any Occasion
Chocolate wafer cookies with hazelnut filling are incredibly versatile. They can be served as a special treat for holidays, parties, or any celebration. Their elegant yet simple appearance makes them ideal for gifting or for a sophisticated addition to dessert tables. You can also vary the flavors slightly by adding spices like cinnamon or cardamom to the hazelnut filling, or by using flavored chocolate, such as orange or mint chocolate, to add a unique twist.
- Tip: To make the cookies even more special, consider adding chopped hazelnuts on top of the filling before sealing the cookie layers together. This gives the cookies an extra crunchy texture and intensifies the hazelnut flavor.
7. Storage and Freshness
Like most cookies, these chocolate wafer cookies with hazelnut filling are best stored in an airtight container to maintain their crispness. However, because of the creamy filling, they can soften over time if not stored properly. For the best texture, eat them within a few days of making them, or freeze the unassembled wafer layers and filling separately for later use.
- Tip: If you’re preparing these cookies in advance, freeze the wafers and filling separately, and assemble the cookies when you’re ready to serve them. This helps preserve the crispy texture of the wafers and the creaminess of the filling.
Strawberry Wafer Cookie Sandwiches: A Delightful Fusion of Sweet and Fruity Flavors
1. The Crisp and Light Texture of the Wafer
The wafer cookies themselves are the perfect foundation for these sandwiches. Their light, airy crunch provides a satisfying contrast to the smooth, creamy strawberry filling. Unlike thicker cookies or cakes that might overwhelm the flavor, wafer cookies let the filling shine through while maintaining a light and delicate texture. This makes strawberry wafer cookie sandwiches a refreshing option for those who want something sweet but not too heavy.
- Tip: Opt for thin wafers to ensure they stay crisp even after the strawberry filling is added. If you prefer a thicker texture, you can double up on the wafers to create a heartier bite.
2. The Sweet, Tangy Strawberry Filling
The star of this dessert is undoubtedly the strawberry filling, which adds a fresh and vibrant flavor that pairs wonderfully with the crunch of the wafer. The strawberry filling can be made from scratch using fresh strawberries, sugar, and a little cream or butter, or you can use store-bought strawberry jam or preserves for convenience. The filling should be smooth and creamy, with just enough sweetness and tang to complement the wafers.
- Tip: To enhance the flavor of the strawberry filling, consider adding a splash of vanilla extract or a few drops of lemon juice. The vanilla adds warmth, while the lemon brightens the flavor of the strawberries, balancing the sweetness.
3. Creating the Sandwich: Layering the Flavors
When assembling the sandwiches, it’s important to apply an even layer of the strawberry filling between two wafer cookies. The filling should be thick enough to create a satisfying bite but not so thick that it overwhelms the crisp wafer. Spreading the filling evenly ensures that every bite has the perfect balance of flavors and textures.
- Tip: Use a piping bag or an offset spatula to apply the filling evenly to each wafer. If you’re making a large batch, it’s a good idea to work quickly to prevent the wafer from becoming too soft as it absorbs moisture from the filling.
4. Adding a Touch of Extra Flavor with Toppings
To elevate the strawberry wafer cookie sandwiches even further, consider adding toppings or garnishes that complement the fruity filling. Fresh strawberry slices, a dusting of powdered sugar, or even a drizzle of melted chocolate can enhance the visual appeal and add an extra layer of flavor. You can also dip one edge of the wafer sandwiches in melted chocolate or sprinkle them with crushed nuts for added texture and taste.
- Tip: For a special touch, garnish each sandwich with a small mint leaf or a few whole strawberries to give them a fresh and elegant appearance.
5. Versatility: Customize Your Sandwiches
While the classic strawberry filling is a hit, there are plenty of ways to customize your wafer cookie sandwiches to suit your taste. You can swap out the strawberry filling for other fruit flavors like raspberry, blueberry, or peach, or even try a combination of fruits. For those who enjoy a richer, creamier filling, you can mix the fruit filling with whipped cream or mascarpone cheese for a more indulgent treat. The wafer cookies themselves can also be flavored with a dash of cinnamon or vanilla for added depth.
- Tip: Experiment with different fillings and flavor combinations to create your signature wafer cookie sandwich. You could also add a little bit of chocolate or caramel to the filling for an extra twist of flavor.
6. Perfect for Any Occasion
Strawberry wafer cookie sandwiches are versatile and can be served at almost any occasion. Whether it’s for a summer party, a picnic, or as an after-dinner treat, these sandwiches are sure to please a crowd. Their light, fruity flavor makes them an ideal option for warmer months, but they can also be enjoyed year-round with fresh or frozen strawberries.
- Tip: For a summer gathering, serve the sandwiches with a chilled beverage like iced tea or lemonade to complement the fruity flavors of the cookies.
7. Storing and Serving Tips
While strawberry wafer cookie sandwiches are best enjoyed fresh to preserve the crispness of the wafer, they can be stored in an airtight container for a day or two. However, over time, the wafer may begin to soften due to the moisture in the filling. To maintain the best texture, it’s ideal to assemble the sandwiches just before serving. If you need to prepare them in advance, store the wafer cookies and strawberry filling separately and assemble them right before serving.
- Tip: If you’re planning to store the sandwiches, place a layer of parchment paper between each sandwich to prevent them from sticking together.
Wafer Cookies with Whipped Cream and Fruit: A Delightful Blend of Sweetness and Freshness
1. The Light and Crispy Wafer Cookie Base
At the heart of this dessert are the wafer cookies, which provide a delightful crunch and serve as the perfect base for the whipped cream and fruit topping. The lightness of the wafers allows the creamy and fruity elements to shine through without overpowering the dish. The crisp texture offers a satisfying contrast to the softness of the whipped cream, creating a perfect balance of textures in every bite.
- Tip: Use thin, delicate wafer cookies to prevent them from becoming too soggy when topped with whipped cream. The thinner the wafer, the better it holds its crunch without becoming overly soft.
2. Homemade or Store-Bought Whipped Cream
The whipped cream adds a luxurious, airy texture that complements the crispness of the wafer. Whether homemade or store-bought, the whipped cream acts as a creamy layer that enhances the flavor profile of the wafer cookies. Freshly whipped cream is light and fluffy, while store-bought options tend to have a denser consistency, but both provide a rich and sweet contrast to the wafer and fruit.
- Tip: For a homemade touch, whip fresh heavy cream with a bit of vanilla extract and powdered sugar until stiff peaks form. For extra flavor, you can even infuse the cream with a bit of lemon zest, cinnamon, or a dash of cocoa powder to elevate the taste.
3. Choosing the Right Fruits
Fruits play a pivotal role in this dessert, adding a burst of natural sweetness and a refreshing tang that balances the richness of the whipped cream. While the combination of fruits is entirely up to your preference, berries such as strawberries, raspberries, or blueberries are particularly popular choices. The slight acidity of berries complements the sweetness of the whipped cream and wafer cookies, creating a harmonious flavor profile.
- Tip: For a more vibrant, colorful dessert, try using a mix of fruits such as sliced strawberries, kiwi, blueberries, and even citrus slices like orange or grapefruit. These fruits not only enhance the flavor but also make the dessert visually appealing.
4. Assembling the Dessert: Layering the Components
Assembling wafer cookies with whipped cream and fruit is a quick and easy process, yet it yields an impressive dessert. The key to creating a perfect dessert is layering. Start by placing a wafer cookie at the bottom, followed by a generous dollop of whipped cream. Top with your chosen fruits and repeat the layers to build a delicious, visually attractive tower of flavors and textures.
- Tip: To ensure the perfect balance of flavors, use about two to three layers of wafer cookies, whipped cream, and fruit. You can also layer these ingredients in a glass parfait dish for a more elegant presentation.
5. Adding Extra Flavor with Toppings
To take your wafer cookies with whipped cream and fruit to the next level, consider adding extra toppings or garnishes. A drizzle of honey, maple syrup, or melted chocolate can add richness to the dessert. A sprinkling of crushed nuts, such as almonds, hazelnuts, or pistachios, can offer a satisfying crunch that contrasts with the creamy and fruity elements.
- Tip: A dash of cinnamon or a light dusting of powdered sugar over the top of the dessert can add an extra layer of flavor without overwhelming the natural taste of the fruit and whipped cream. Alternatively, a few fresh mint leaves can add a touch of freshness and color.
6. Perfect for Any Occasion
This dessert is incredibly versatile and can be served at various occasions, whether it’s a family gathering, a summer picnic, or a festive holiday event. The light and fresh nature of the dessert make it especially suitable for warmer months, but it can be enjoyed year-round by using seasonal fruits or frozen options. The combination of wafer cookies, whipped cream, and fruit offers a refreshing contrast to heavier, more indulgent desserts, making it an ideal choice for any gathering.
- Tip: Serve this dessert as a light after-dinner treat or as part of a dessert table at a larger gathering. You can prepare individual portions in small glasses or bowls to make serving easier.
7. Storing and Serving Tips
While wafer cookies with whipped cream and fruit are best served fresh, you can prepare some of the components in advance to save time. Whip the cream ahead of time and refrigerate it until you’re ready to assemble. Keep the wafer cookies in an airtight container to maintain their crispness. However, it’s best to assemble the dessert just before serving to prevent the whipped cream from wilting or the wafer from becoming soggy.
Serving and Storing Your Wafer Cookies

How to Store Wafer Cookies for Freshness: Ensuring Long-Lasting Crispiness and Flavor
1. Store Wafer Cookies in an Airtight Container
The most important factor in maintaining the crispiness of your wafer cookies is keeping them away from moisture and air. Wafer cookies are especially susceptible to becoming soggy or soft if they are exposed to humidity. Therefore, storing them in an airtight container is essential. Choose a container that seals tightly and prevents any air from entering. Glass jars with tight-fitting lids, plastic containers, or resealable bags are all great options for storing wafer cookies.
- Tip: If you have leftover wafer cookies that come in a sealed package, make sure to close the package tightly after opening or transfer them to an airtight container to preserve their freshness.
2. Keep in a Cool, Dry Place
While wafer cookies need protection from moisture, they also require storage in a cool, dry environment to prevent them from losing their flavor. A pantry or cupboard is an ideal storage location. Keep the container away from heat sources, such as direct sunlight, stoves, or ovens, as heat can cause the wafers to lose their crispness and flavor.
- Tip: Avoid storing wafer cookies near items with strong odors, such as spices, onions, or cleaning products, as cookies are highly absorbent and may pick up unwanted flavors from their surroundings.
3. Use Desiccants or Moisture-Absorbing Packs
In environments where humidity is high, it’s a good idea to include a moisture-absorbing packet inside the storage container. These desiccant packs help to absorb any excess moisture in the air, preventing the wafer cookies from becoming soggy. If you don’t have these packs on hand, you can use a piece of wax paper or a napkin placed in the container to help absorb any moisture.
- Tip: If you are storing homemade wafer cookies, ensure that they are completely cooled before placing them in the container. Warm cookies can release moisture, which may affect their crispiness.
4. Freezing Wafer Cookies for Long-Term Storage
If you’ve made a large batch of wafer cookies and want to keep them fresh for a longer period, freezing is an excellent option. Freezing wafer cookies preserves their texture and flavor while allowing you to store them for several months. To freeze wafer cookies, place them in a single layer on a baking sheet to ensure they don’t stick together. Once frozen, transfer the cookies into a resealable freezer bag or airtight container. Label the container with the date of freezing to keep track of freshness.
- Tip: To maintain optimal texture, try to consume frozen wafer cookies within 2-3 months. Allow them to thaw at room temperature before serving, and they will retain much of their original crispness.
5. Avoid Storing with Other Baked Goods
When storing wafer cookies, it’s best to keep them separate from other baked goods, especially items with a higher moisture content, like cakes or cookies with fillings. Moisture from these baked goods can transfer to the wafer cookies, causing them to lose their crisp texture. It’s important to store wafer cookies in their own airtight container to prevent cross-contamination of moisture and flavor.
- Tip: If you’re storing various types of cookies, use separate containers for each type. This will help preserve the distinct textures and flavors of each treat.
6. Shelf Life of Wafer Cookies
Depending on whether they are store-bought or homemade, the shelf life of wafer cookies can vary. Store-bought wafer cookies usually have preservatives that help maintain their freshness for a longer period. On the other hand, homemade wafer cookies may not last as long without preservatives, so it’s best to enjoy them within a week or two. Freezing can help extend their shelf life.
- Tip: Always check the packaging for any “best by” dates or expiration information. Homemade cookies may require a little more attention, but by following the proper storage guidelines, they can last up to a month if stored correctly.
7. Reviving Soft Wafer Cookies
If your wafer cookies have lost their crunch, don’t worry – you can often restore their crispness. Preheat your oven to a low temperature (around 200°F or 93°C) and place the wafer cookies on a baking sheet in a single layer. Heat them for 5-10 minutes, monitoring closely to ensure they don’t burn. This will help evaporate any moisture and bring back their crisp texture.
- Tip: Let the cookies cool completely before storing them again, as moisture from heat could cause them to become soft once more.
Creative Ways to Serve Wafer Cookies: Elevating Your Dessert Experience
Wafer cookies, with their light and crispy texture, are a versatile treat that can be enjoyed on their own or transformed into something extraordinary with a bit of creativity. Whether you’re hosting a party, planning a special occasion, or just want to elevate your everyday snack, there are countless ways to serve wafer cookies that will surprise and delight your guests. Here are some creative and fun ideas for serving wafer cookies that will turn this simple treat into a memorable experience.
1. Wafer Cookie Ice Cream Sandwiches
One of the most popular and fun ways to serve wafer cookies is by turning them into ice cream sandwiches. Their crisp texture pairs beautifully with the creamy, rich flavor of ice cream. To create this treat, simply scoop a generous portion of your favorite ice cream onto a wafer cookie, and top it with another wafer cookie to form a sandwich. You can mix and match different flavors of ice cream and wafer cookies for endless combinations. For an extra touch, roll the edges of the ice cream sandwiches in sprinkles, chopped nuts, or mini chocolate chips.
- Tip: For an extra burst of flavor, drizzle melted chocolate or caramel over the ice cream sandwich before serving.
2. Wafer Cookie Crumble Toppings
Transform your wafer cookies into a delightful crumble topping for cakes, cupcakes, or even ice cream sundaes. Crushed wafer cookies can add a delicious crunch and a burst of flavor when sprinkled over desserts. For a simple yet indulgent treat, top a scoop of vanilla ice cream with crushed wafer cookies, a drizzle of chocolate syrup, and a cherry on top. You can also use wafer cookie crumbles to top fruit parfaits or layer them in between layers of whipped cream and fresh fruit for a quick and easy dessert.
- Tip: Combine crushed wafer cookies with other ingredients like granola, chocolate chips, or toasted coconut for an even more dynamic topping.
3. Wafer Cookie Cake Layers
Take your cake to the next level by using wafer cookies as an alternative to traditional cake layers. Stack wafer cookies with a filling of your choice, such as whipped cream, frosting, or custard, to create a no-bake wafer cake. This layered dessert is not only visually appealing but also offers a fun and unique texture combination. The crispness of the wafer cookies provides a delightful contrast to the creamy filling, making each bite a satisfying experience.
- Tip: Chill the cake in the refrigerator for a few hours before serving to allow the flavors to meld together and ensure the wafer cookies soften just slightly while retaining their structure.
4. Wafer Cookie Parfaits
Create beautiful and delicious parfaits by layering wafer cookies with yogurt, whipped cream, and fresh fruit. The lightness of the wafer cookies pairs wonderfully with the richness of the cream and the freshness of the fruit, making for a well-balanced dessert. For an indulgent twist, add a layer of chocolate ganache or caramel sauce between the wafer layers. These parfaits are perfect for breakfast, brunch, or as a light dessert.
- Tip: Experiment with different types of fruits and fillings. Try using strawberries, raspberries, or even mango for a tropical twist.
5. Wafer Cookie Dipped in Chocolate
For a more elegant and indulgent take on wafer cookies, try dipping them in melted chocolate. Dark, milk, or white chocolate can be melted and used to coat the wafer cookies, adding an extra layer of richness and flavor. You can dip the entire cookie, or just half of it, for a delightful contrast. To elevate the presentation, add a sprinkle of crushed nuts, sea salt, or colorful sprinkles on top of the chocolate before it sets.
- Tip: Let the chocolate coating harden in the refrigerator for about 30 minutes before serving to ensure a smooth, firm finish.
6. Wafer Cookie Stacks with Fruit Filling
If you want to add a fruity element to your wafer cookies, stack them with a layer of fruit filling or jam. A popular combination is to use raspberry or strawberry jam, but you can experiment with other fruit spreads like peach or apricot. The sweetness of the jam complements the crispy wafer texture and makes for a satisfying, bite-sized treat. You can serve these stacked wafer cookies on a decorative plate for a fun snack or dessert.
- Tip: For an extra indulgence, add a dollop of whipped cream or a dusting of powdered sugar on top of each stack before serving.
7. Wafer Cookie Truffles
Transform wafer cookies into bite-sized truffles for an indulgent treat. Start by crushing the wafer cookies into fine crumbs, then mix them with a rich, sweet filling such as cream cheese, peanut butter, or chocolate ganache. Once combined, roll the mixture into small balls and coat them in melted chocolate or powdered sugar. These wafer cookie truffles are a deliciously rich snack or gift idea, perfect for sharing at parties or gatherings.
- Tip: Add flavorings like vanilla extract or cocoa powder to the mixture for a deeper taste. You can also sprinkle them with chopped nuts or coconut flakes for texture.
8. Wafer Cookie Garnish for Beverages
Wafer cookies can also be used as a fun garnish for drinks. Place a wafer cookie on the rim of a glass for an eye-catching presentation. This is especially effective for beverages like milkshakes, iced coffee, or hot chocolate. The crispy wafer will add a touch of sweetness to the drink, and guests can enjoy it as an added treat once they’ve finished their beverage.
- Tip: Use flavored wafer cookies, like chocolate or caramel, to complement the flavor profile of the beverage.
9. Wafer Cookie S’mores
Give the classic s’mores a fun twist by using wafer cookies in place of graham crackers. Layer roasted marshmallows and melted chocolate between two wafer cookies for a crunchy, gooey s’mores treat. These wafer cookie s’mores can be served as a fun snack at a camping trip, a bonfire, or even just as an after-dinner treat.
- Tip: Try adding a drizzle of peanut butter or caramel for an extra layer of flavor.
Pairing Wafer Cookies with Beverages: A Perfect Complement to Every Sip
Wafer cookies are a delightful treat that can elevate the experience of enjoying a beverage, whether you’re having a cup of tea, coffee, or something more indulgent. The delicate crunch and light texture of wafer cookies pair wonderfully with a wide range of drinks, offering a satisfying contrast and enhancing the overall flavor profile of both the cookie and the beverage. Here are some creative ways to pair wafer cookies with your favorite drinks for an exceptional snacking experience.
1. Wafer Cookies with Hot Beverages: A Cozy Combination
Hot beverages like coffee, tea, hot chocolate, or even warm milk are the perfect companions for wafer cookies. The crispy, airy texture of the wafers contrasts beautifully with the warmth and richness of these drinks. Whether you enjoy a strong espresso, a creamy latte, or a calming cup of chamomile tea, wafer cookies offer a light, sweet treat to balance out the bitterness or warmth of the beverage.
- Coffee: A classic pairing for wafer cookies is with coffee, particularly with a shot of espresso or a creamy cappuccino. The bitterness of the coffee contrasts nicely with the sweetness and crispiness of the wafer, creating a harmonious balance of flavors.
- Tip: For an added touch, dunk the wafer into your coffee for a few seconds to soften it slightly before enjoying.
- Hot Chocolate: For a more indulgent treat, pair wafer cookies with a rich cup of hot chocolate. The creamy, chocolatey goodness of the drink complements the crisp, light texture of the wafers. Adding a marshmallow or whipped cream topping to your hot chocolate creates an extra layer of decadence when enjoyed alongside wafer cookies.
- Tip: You can also sprinkle crushed wafer cookies on top of your hot chocolate for a delightful, crunchy garnish.
2. Wafer Cookies with Tea: Light and Refreshing
Tea is a perfect match for wafer cookies, especially when you’re in the mood for something light and refreshing. Whether you prefer a bold black tea, a fragrant green tea, or a floral herbal blend, the gentle flavors of wafer cookies won’t overpower the tea’s subtle notes. The wafer’s sweetness and crunch create a delightful contrast with the delicate flavors of tea, making them an ideal snack for tea time.
- Black Tea: A strong, robust black tea, such as Earl Grey or Assam, pairs beautifully with wafer cookies, especially those with a rich chocolate or hazelnut filling. The slight bitterness of the tea balances the sweetness of the wafer, creating a perfect harmony.
- Tip: Try dunking the wafer in the tea for a few seconds to enhance the flavor and soften the texture slightly.
- Green Tea: For a lighter, more refreshing pairing, match wafer cookies with a cup of green tea. The crisp, lightly sweet wafers complement the herbal, grassy notes of green tea, offering a clean and refreshing combination.
- Tip: Opt for a matcha-flavored wafer cookie to enhance the green tea experience with a complementary flavor profile.
- Herbal Teas: Herbal teas like chamomile, peppermint, or hibiscus have a soothing, aromatic quality that pairs wonderfully with the mild sweetness of wafer cookies. The gentle flavors of the tea allow the wafer’s flavor to shine through without overpowering the palate.
- Tip: Pair a chamomile tea with vanilla wafer cookies for a calming and comforting snack.
3. Wafer Cookies with Milk: A Nostalgic Pairing
There’s something nostalgic and comforting about dipping a wafer cookie into a cold glass of milk. The combination of the wafer’s light, crisp texture and the creaminess of milk creates a satisfying balance of flavors and textures. Whether you’re enjoying a classic vanilla wafer or a chocolate-dipped version, milk enhances the sweetness of the wafer while adding a smooth, creamy element to the experience.
- Tip: For a fun twist, pair flavored milk, such as strawberry or chocolate milk, with your wafer cookies to complement the taste and add a bit of variety to the classic combination.
4. Wafer Cookies with Cold Beverages: Refreshing and Sweet
For a more refreshing snack, pair wafer cookies with cold beverages like iced coffee, iced tea, or fruit juices. The coolness of these drinks contrasts beautifully with the crisp, slightly sweet wafer cookies, making for a satisfying treat that’s perfect for warmer weather.
- Iced Coffee: If you’re a fan of cold coffee drinks, try pairing your wafer cookies with iced coffee or an iced latte. The wafer’s crunch and sweetness provide a perfect complement to the coffee’s chill and mild bitterness. The light, airy texture of the wafer balances out the richness of the coffee.
- Tip: Experiment with different flavored syrups, like vanilla or caramel, in your iced coffee for an added layer of sweetness that pairs perfectly with your wafer cookies.
- Iced Tea: A chilled glass of iced tea, whether it’s classic black, green, or fruity tea, is an ideal accompaniment for wafer cookies. The cool, refreshing nature of iced tea enhances the crispy texture of the wafer, making it a delightful and light pairing.
- Tip: Add a slice of lemon or mint leaves to your iced tea to freshen the flavor profile and create an even more refreshing experience.
- Fruit Juices: Fruit juices like orange juice, apple juice, or berry blends provide a sweet and tangy contrast to the sweetness of wafer cookies. The fruity flavors of the juice complement the wafer’s taste, making for a fun and refreshing pairing.
- Tip: Try pairing citrus-flavored wafer cookies, like lemon or orange, with fruit juices for a more cohesive and flavorful snack.
5. Wafer Cookies with Alcoholic Beverages: A Sophisticated Treat
If you’re hosting a party or enjoying a special evening, wafer cookies can also pair well with certain alcoholic beverages. The subtle sweetness of wafer cookies works surprisingly well with a variety of spirits and cocktails. You can experiment with pairing wafers alongside wines, liqueurs, or even a light beer for a sophisticated treat.
- Wine: For a more refined pairing, opt for a light white wine, such as Sauvignon Blanc or Pinot Grigio. These wines’ crisp acidity pairs well with the sweetness and crunch of wafer cookies, making for an elegant and delightful combination.
- Tip: Pair chocolate wafer cookies with a rich dessert wine, such as Port or a late-harvest Riesling, to create a decadent treat.
- Liqueurs: Liqueurs like Baileys Irish Cream, Amaretto, or Chambord offer a smooth, flavorful pairing with wafer cookies. The creamy and fruity flavors of these liqueurs complement the wafer’s texture, creating an indulgent and luxurious treat.
- Tip: Pair vanilla wafer cookies with a shot of Baileys Irish Cream for a creamy, sweet combination.
- Light Beer or Cider: For a fun and unexpected pairing, try pairing wafer cookies with a light beer or hard cider. The crisp, slightly bitter flavor of the beer or cider pairs perfectly with the sweetness of the wafer cookie, creating a balanced and enjoyable experience.
- Tip: Choose a fruity cider to enhance the flavor of fruit-filled wafer cookies.
Conclusion: Enjoying Wafer Cookies with the Perfect Beverage
Wafer cookies are incredibly versatile and offer endless possibilities when paired with your favorite beverages. Whether you’re enjoying a comforting cup of tea, a rich coffee, or a refreshing cold drink, wafer cookies add a delightful crunch and sweetness that enhances the overall experience. From classic pairings like coffee and milk to more adventurous combinations with wine or liqueurs, there’s no shortage of ways to enjoy these crispy treats.
The key to a perfect pairing lies in balancing the flavor profiles of both the wafer cookies and the beverage, ensuring that neither overpowers the other. Experimenting with different drinks can lead to exciting new flavor combinations, making wafer cookies not just a snack but a versatile addition to any occasion.
So, the next time you’re reaching for a wafer cookie, take a moment to consider the ideal beverage to accompany it. With the right drink, you can elevate your snack time and enjoy a perfect, delicious pairing every time.